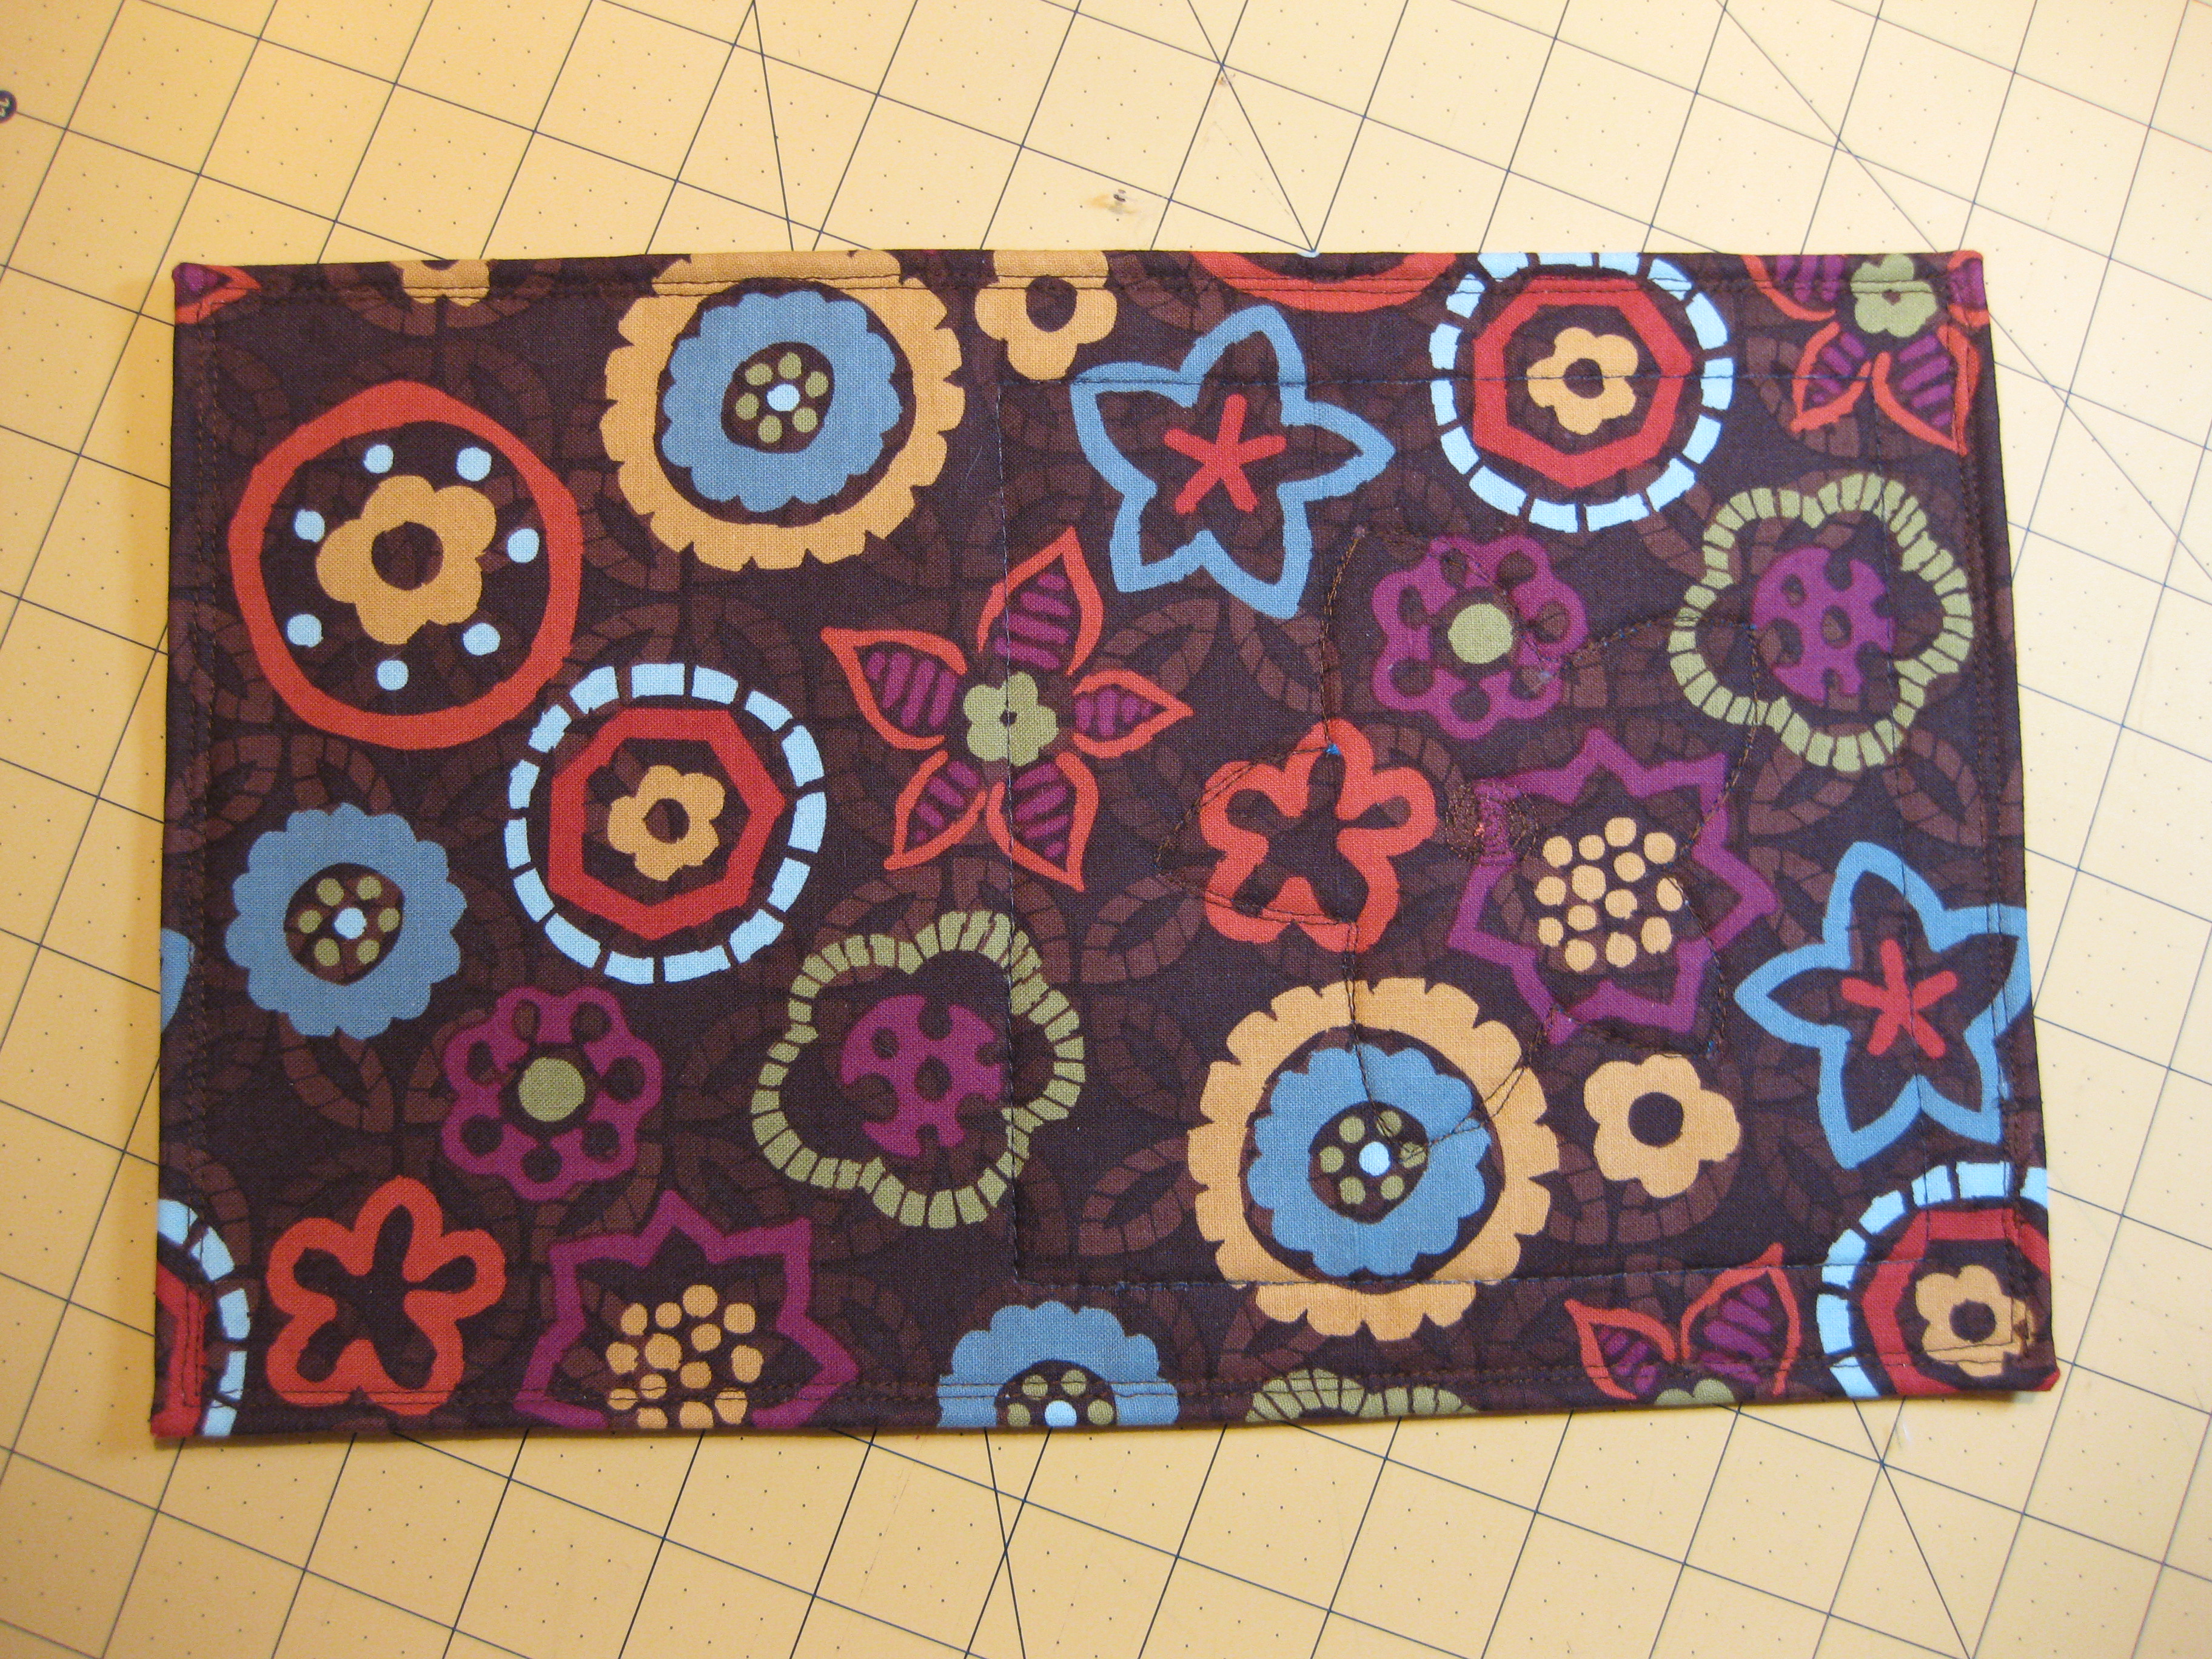
I signed up for a Secret Santa swap through an on-line group I belong to and had to include something I made. After much pondering and many discarded ideas, I settled on making mug rugs. TWO mug rugs, to be exact, so my lady would be ready for company. Having never made mug rugs before I decided to wing it. I sooooo love the fabric I used and, as it happens, I had a fat quarter set of them. Of course, I used them only after agonizing about doing so in a project for someone I don’t know. Hope that doesn’t make me sound too . . . selfish?
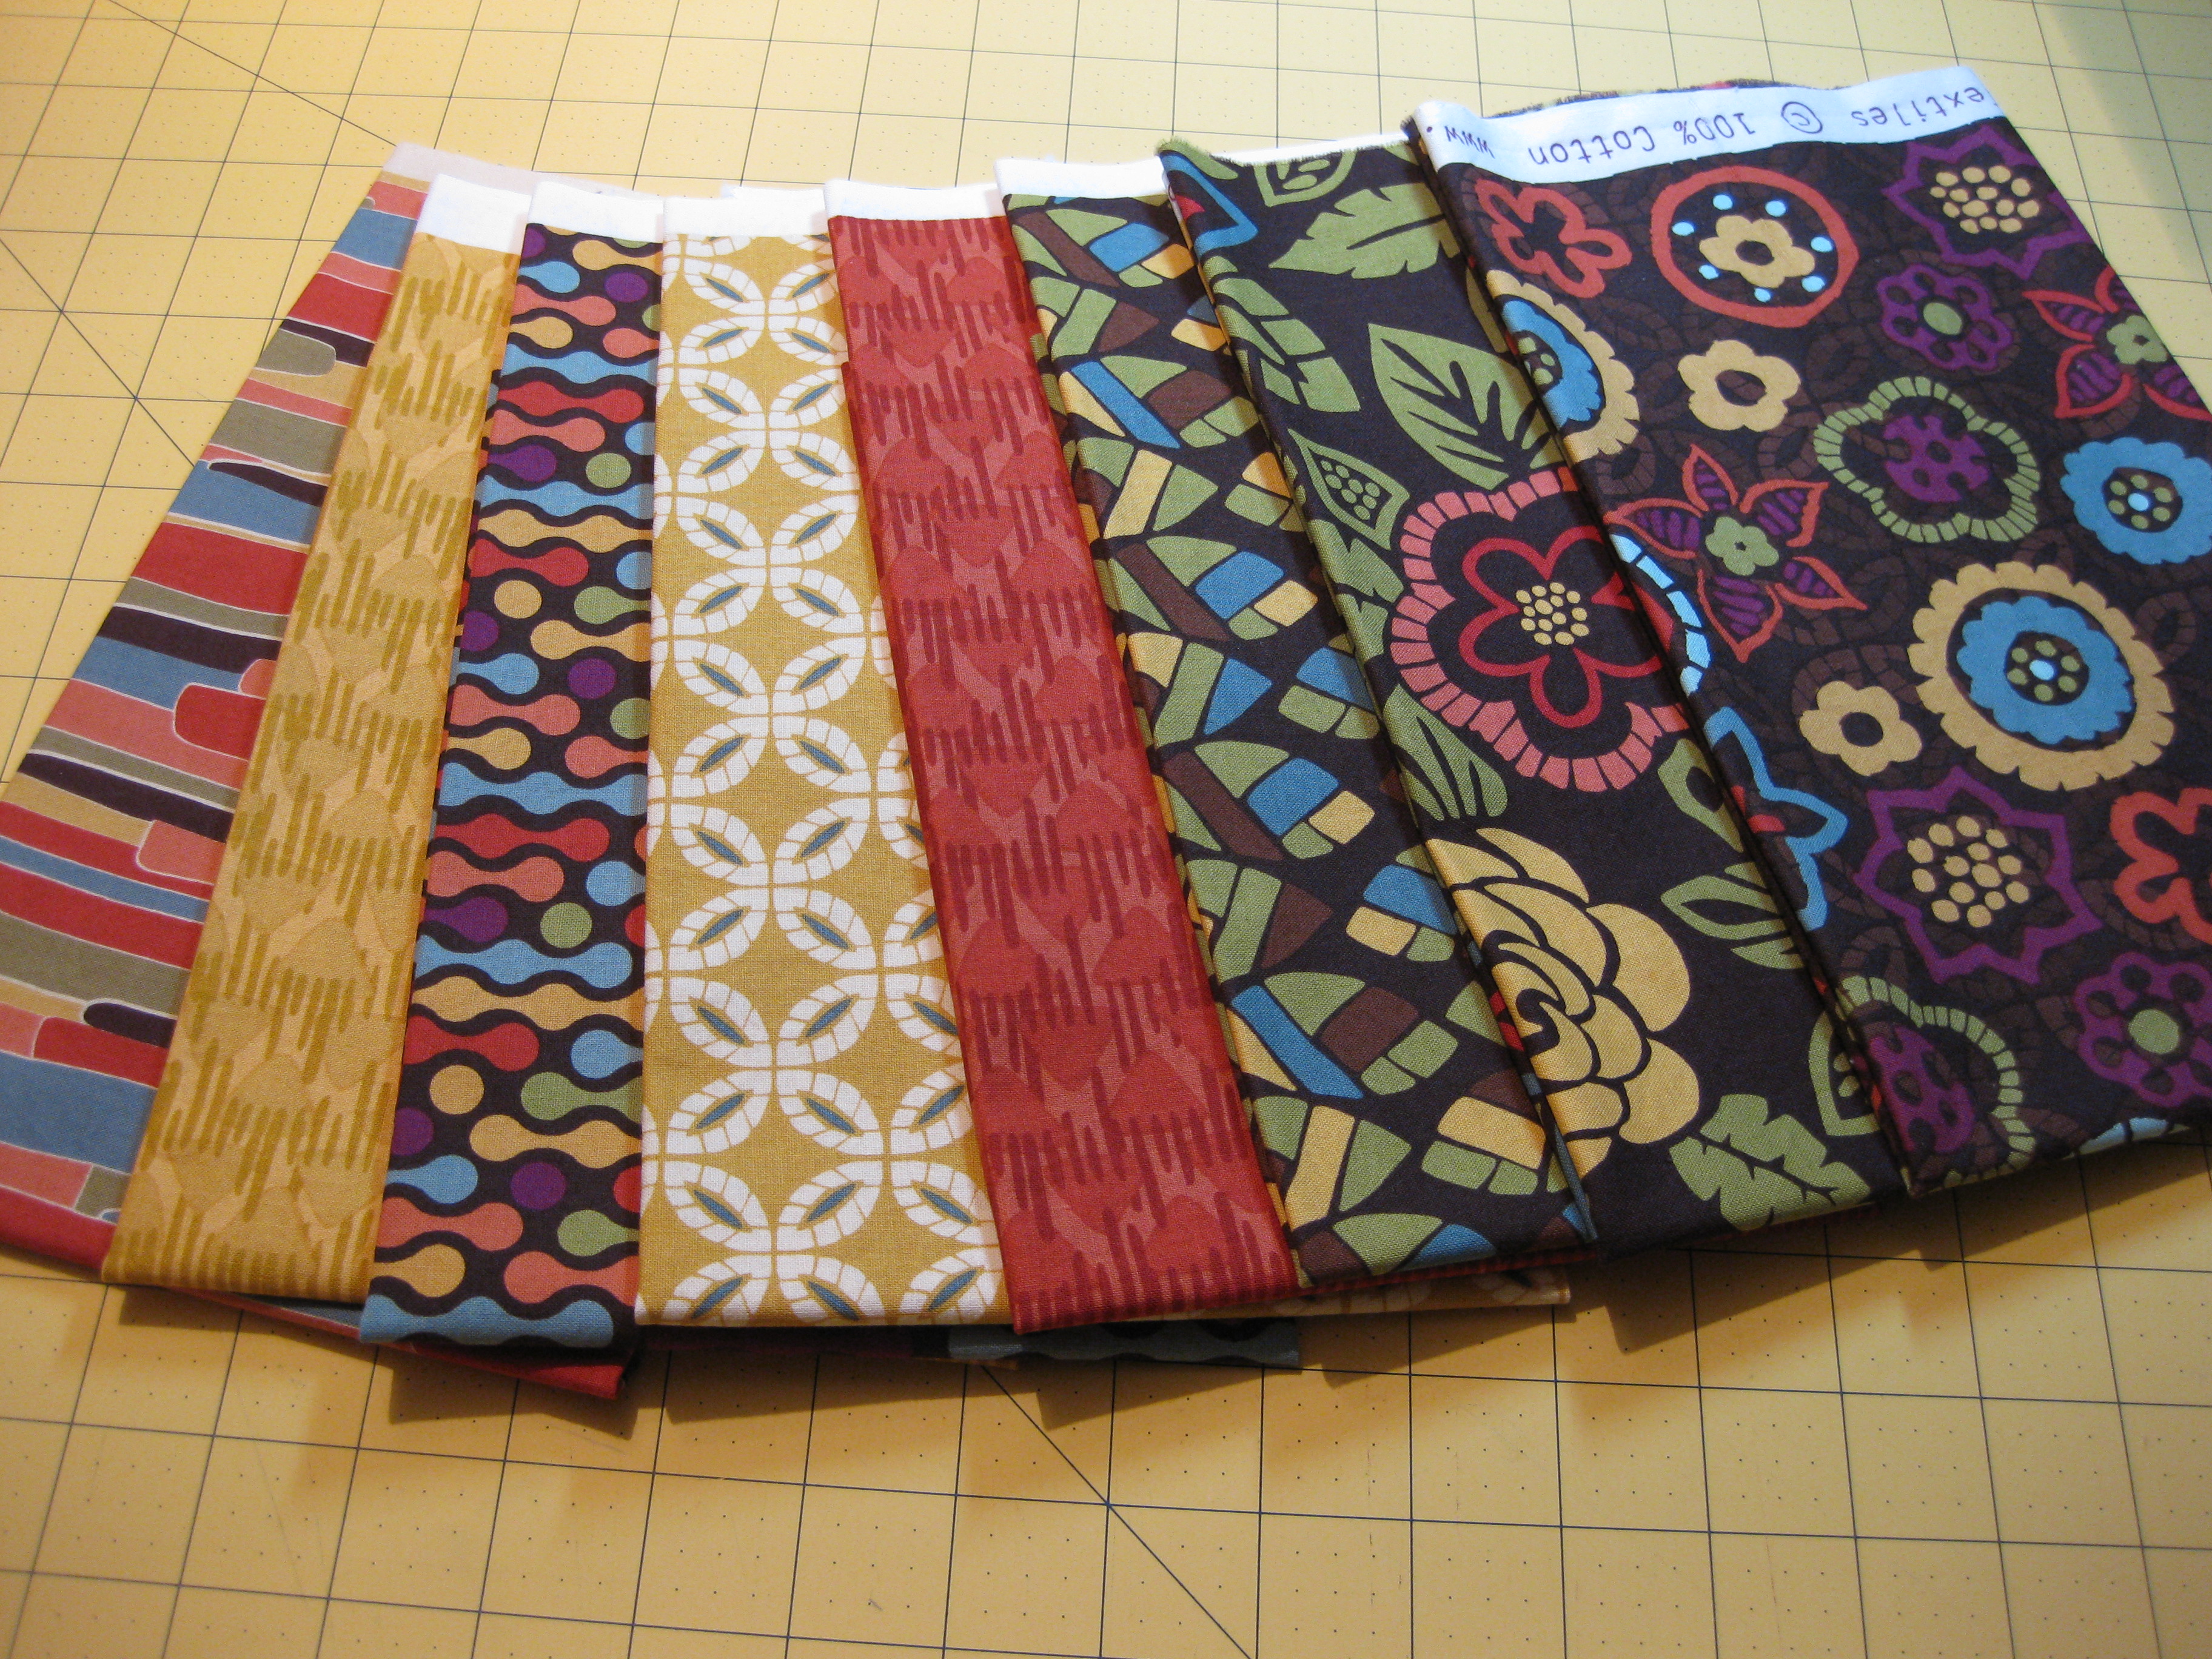
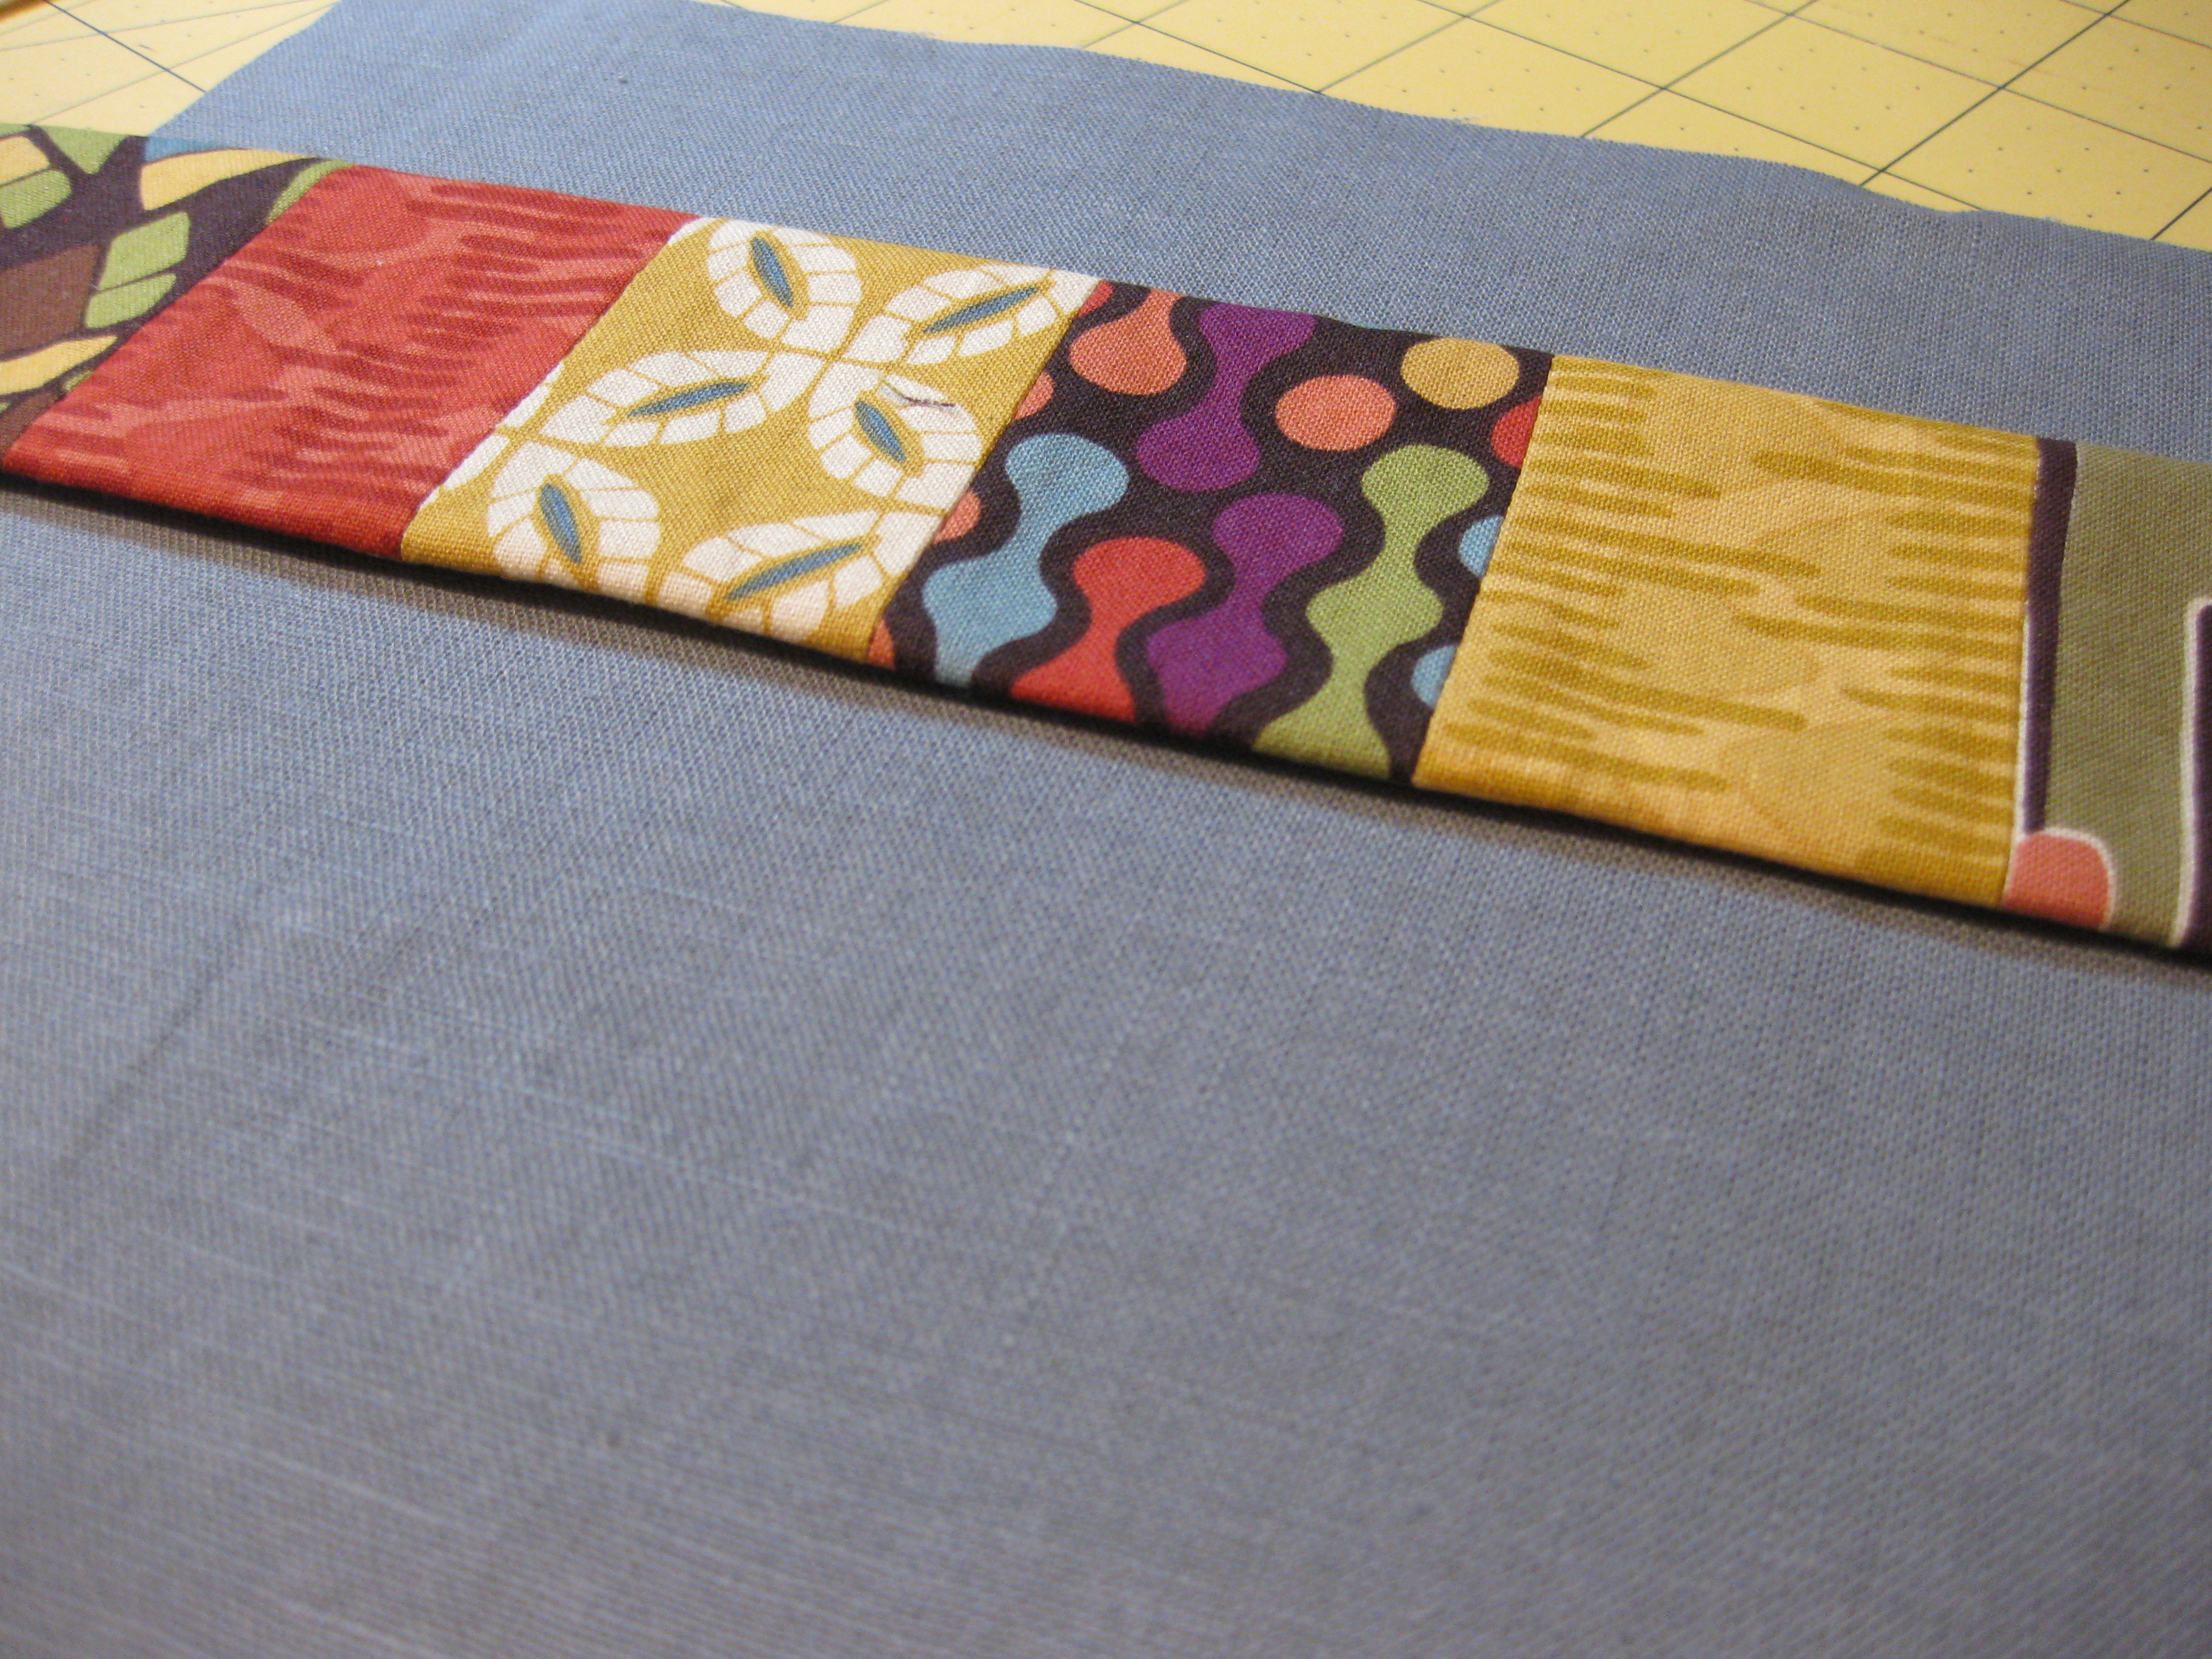
Anyhow, here’s the fabric – “Nomad” by Jen Fox for P&B Textiles. Wonderful! 🙂
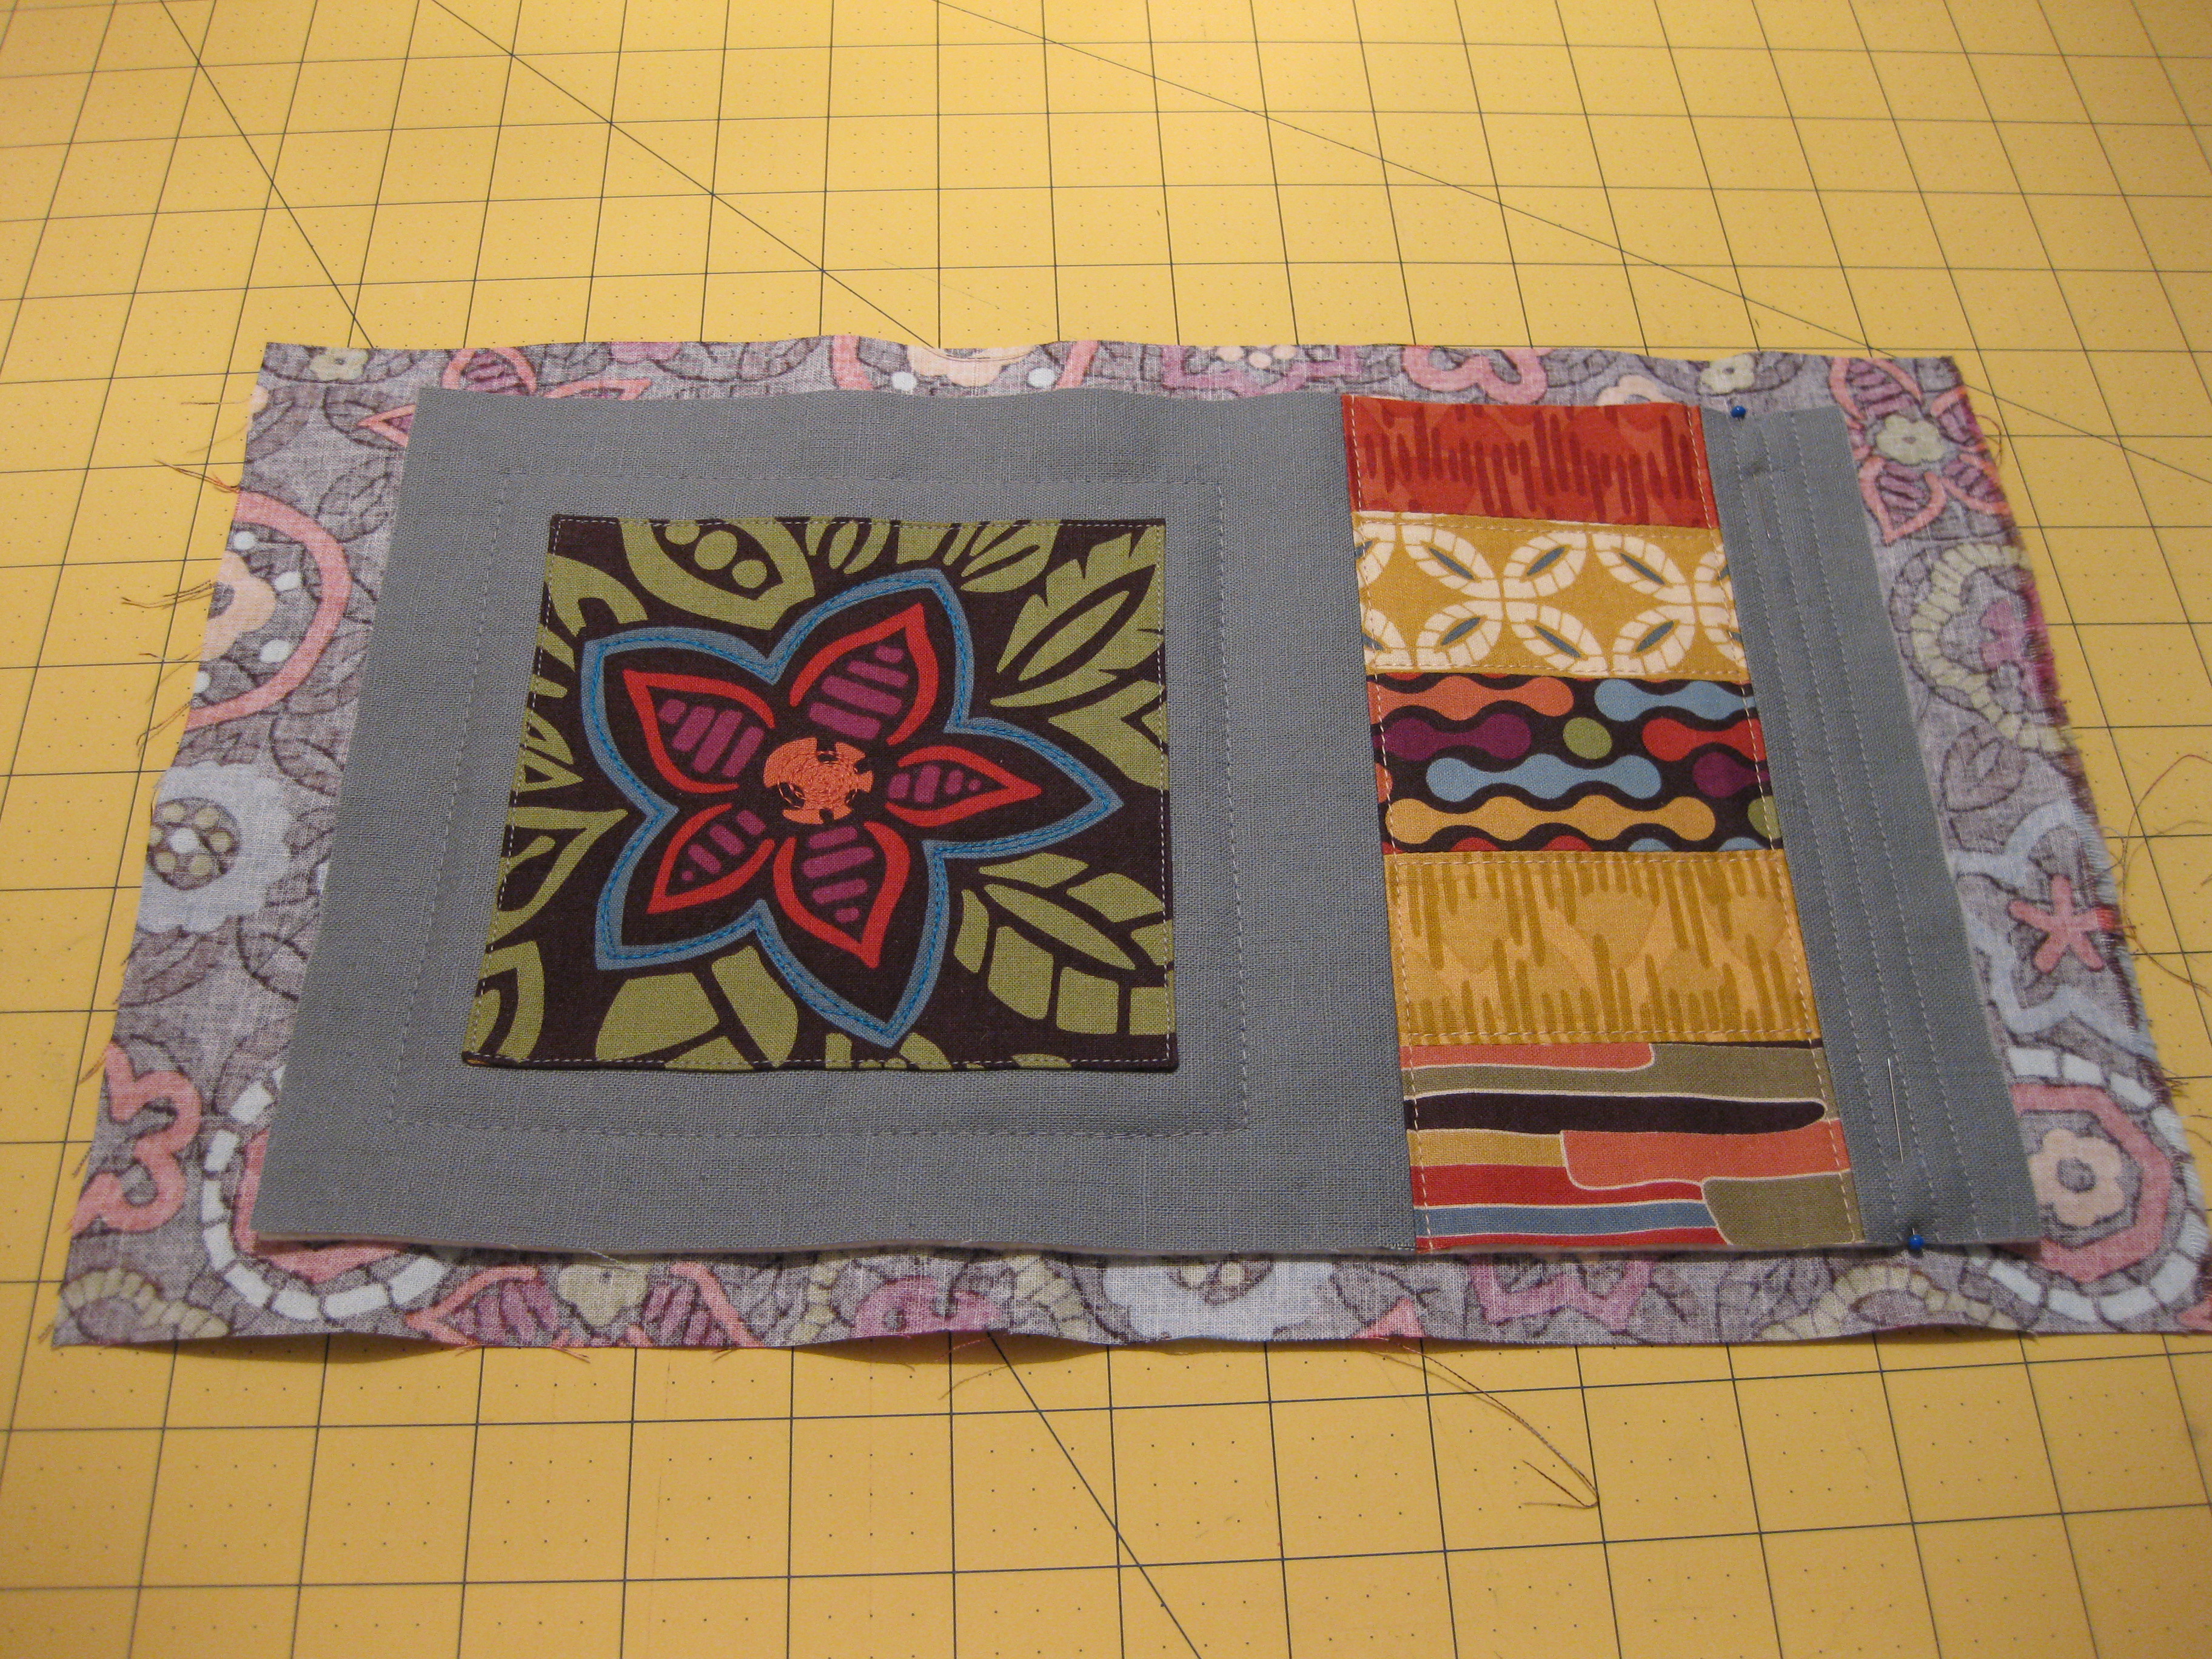
Next, I opted to use a linen cotton blend fabric for the background. Though I liked the idea of a tan color, once I explored a bit further, I definitely preferred a gray.
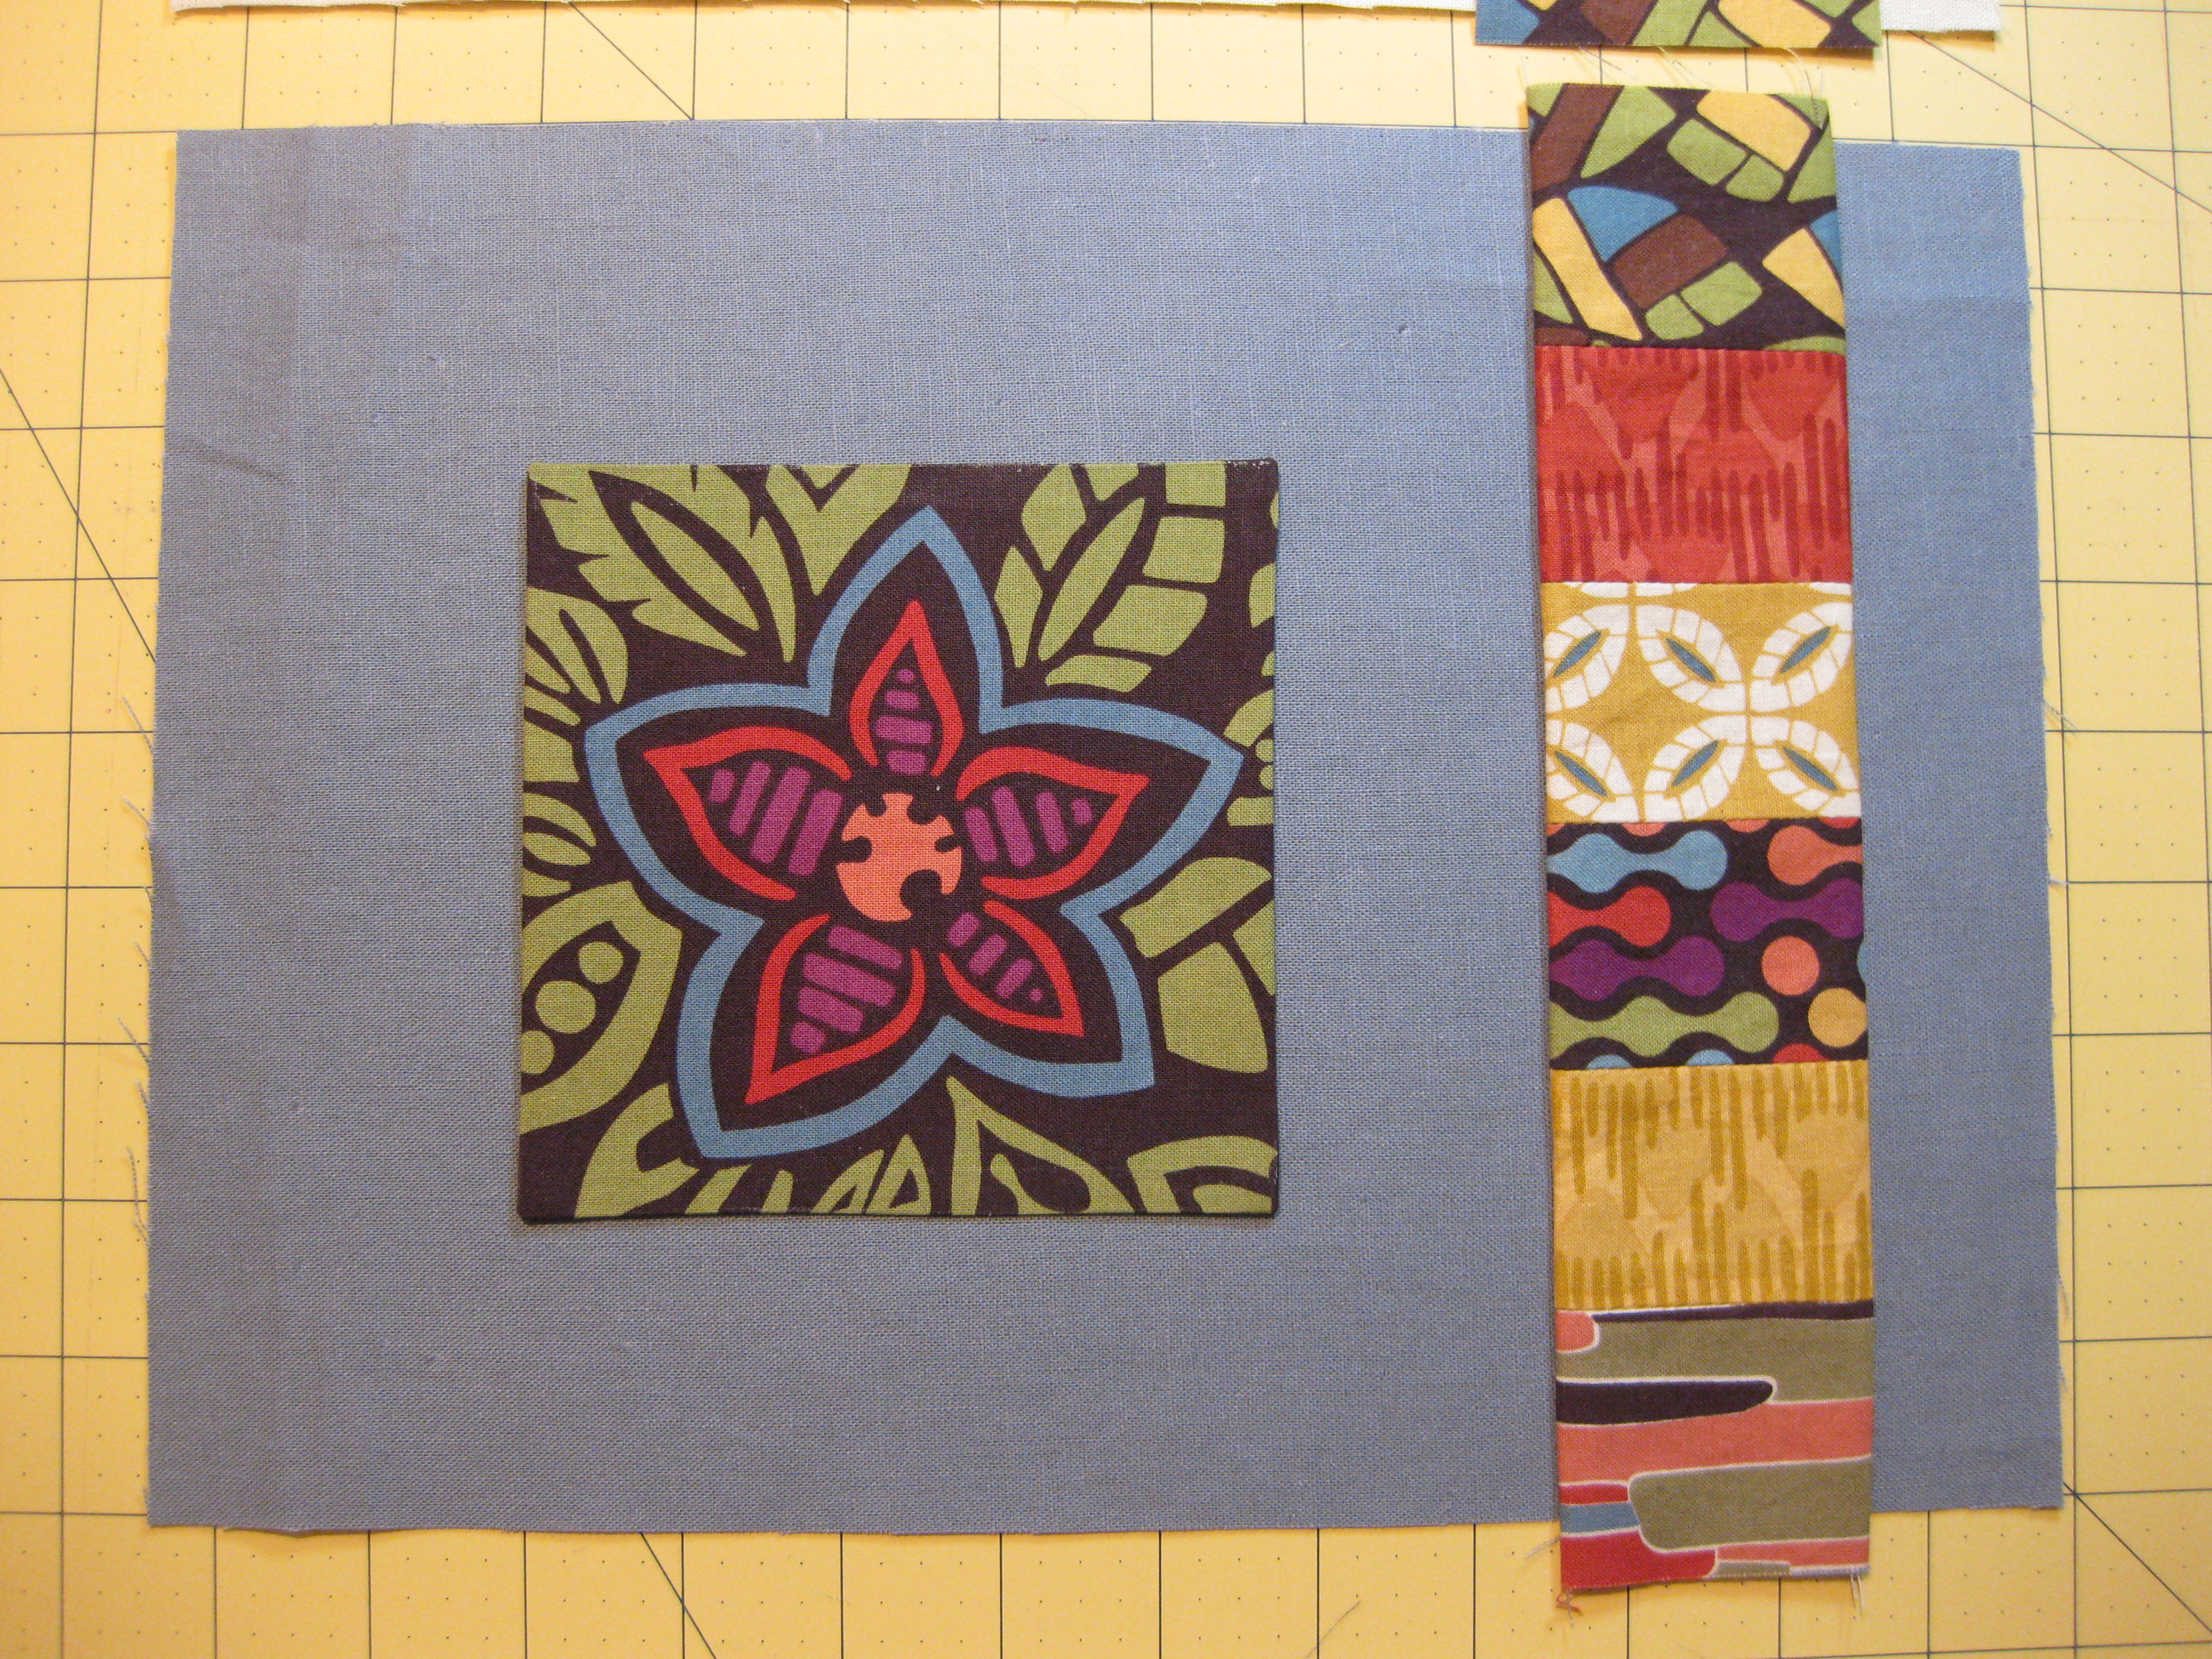
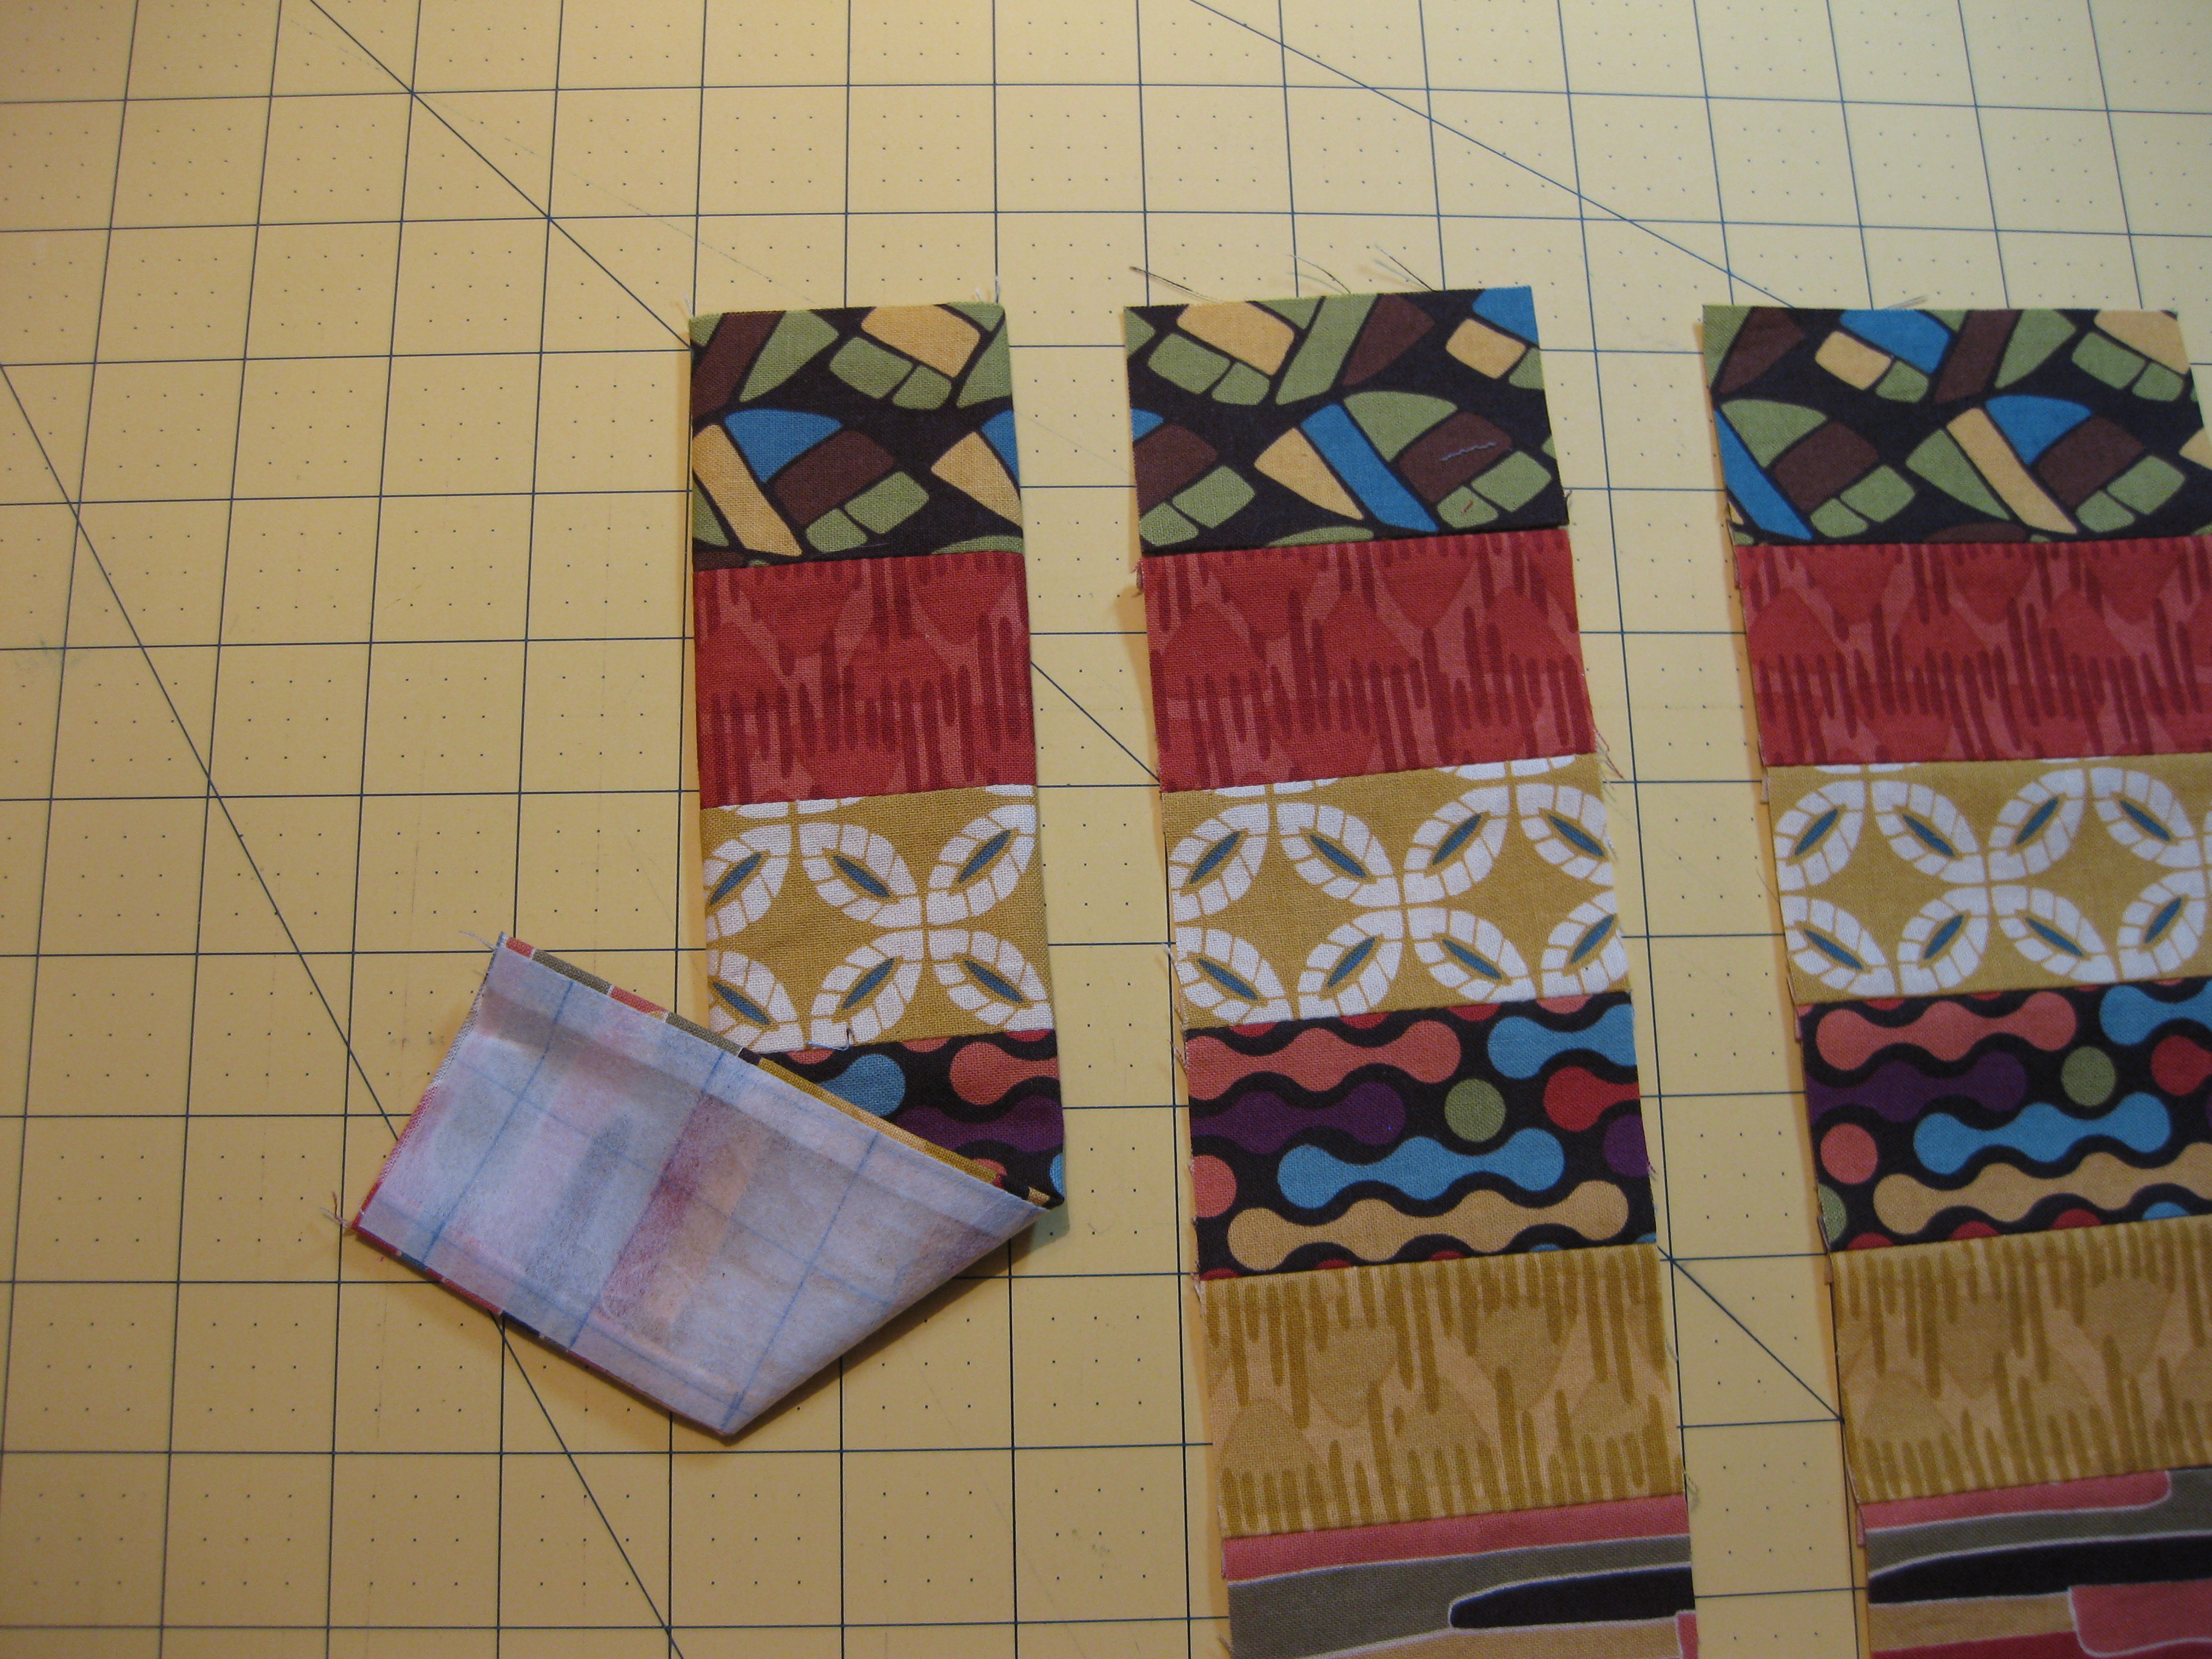
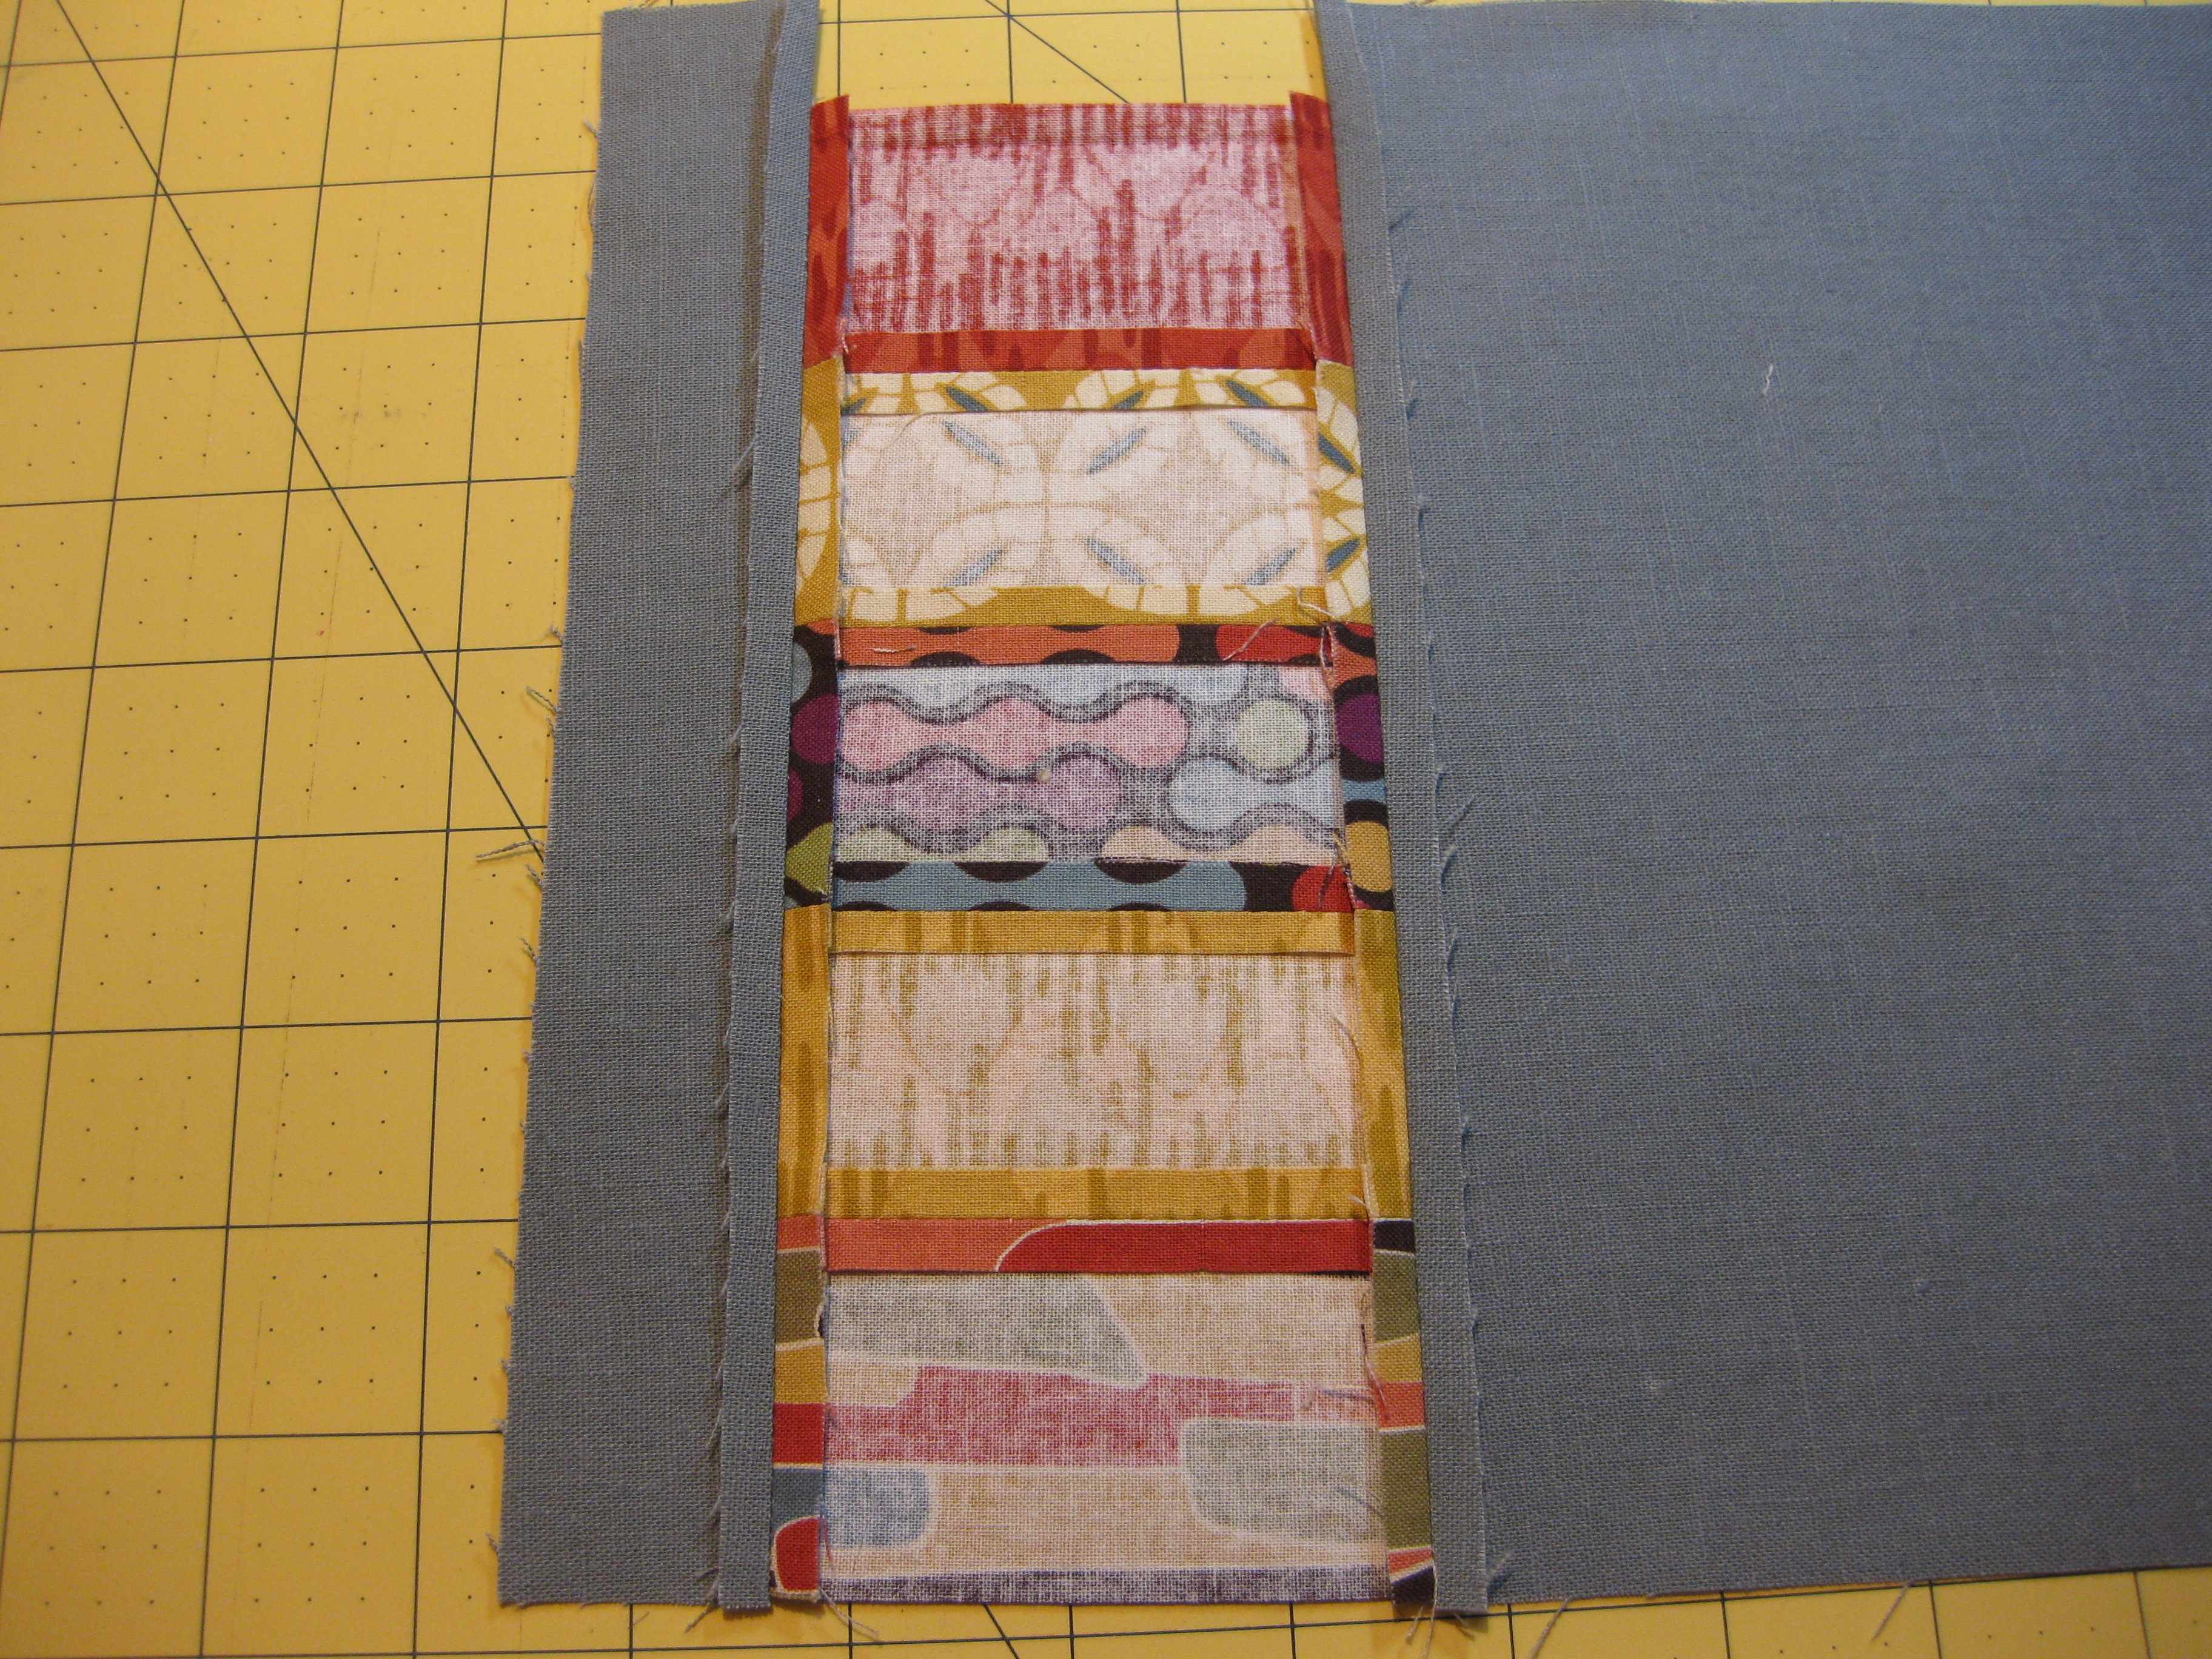
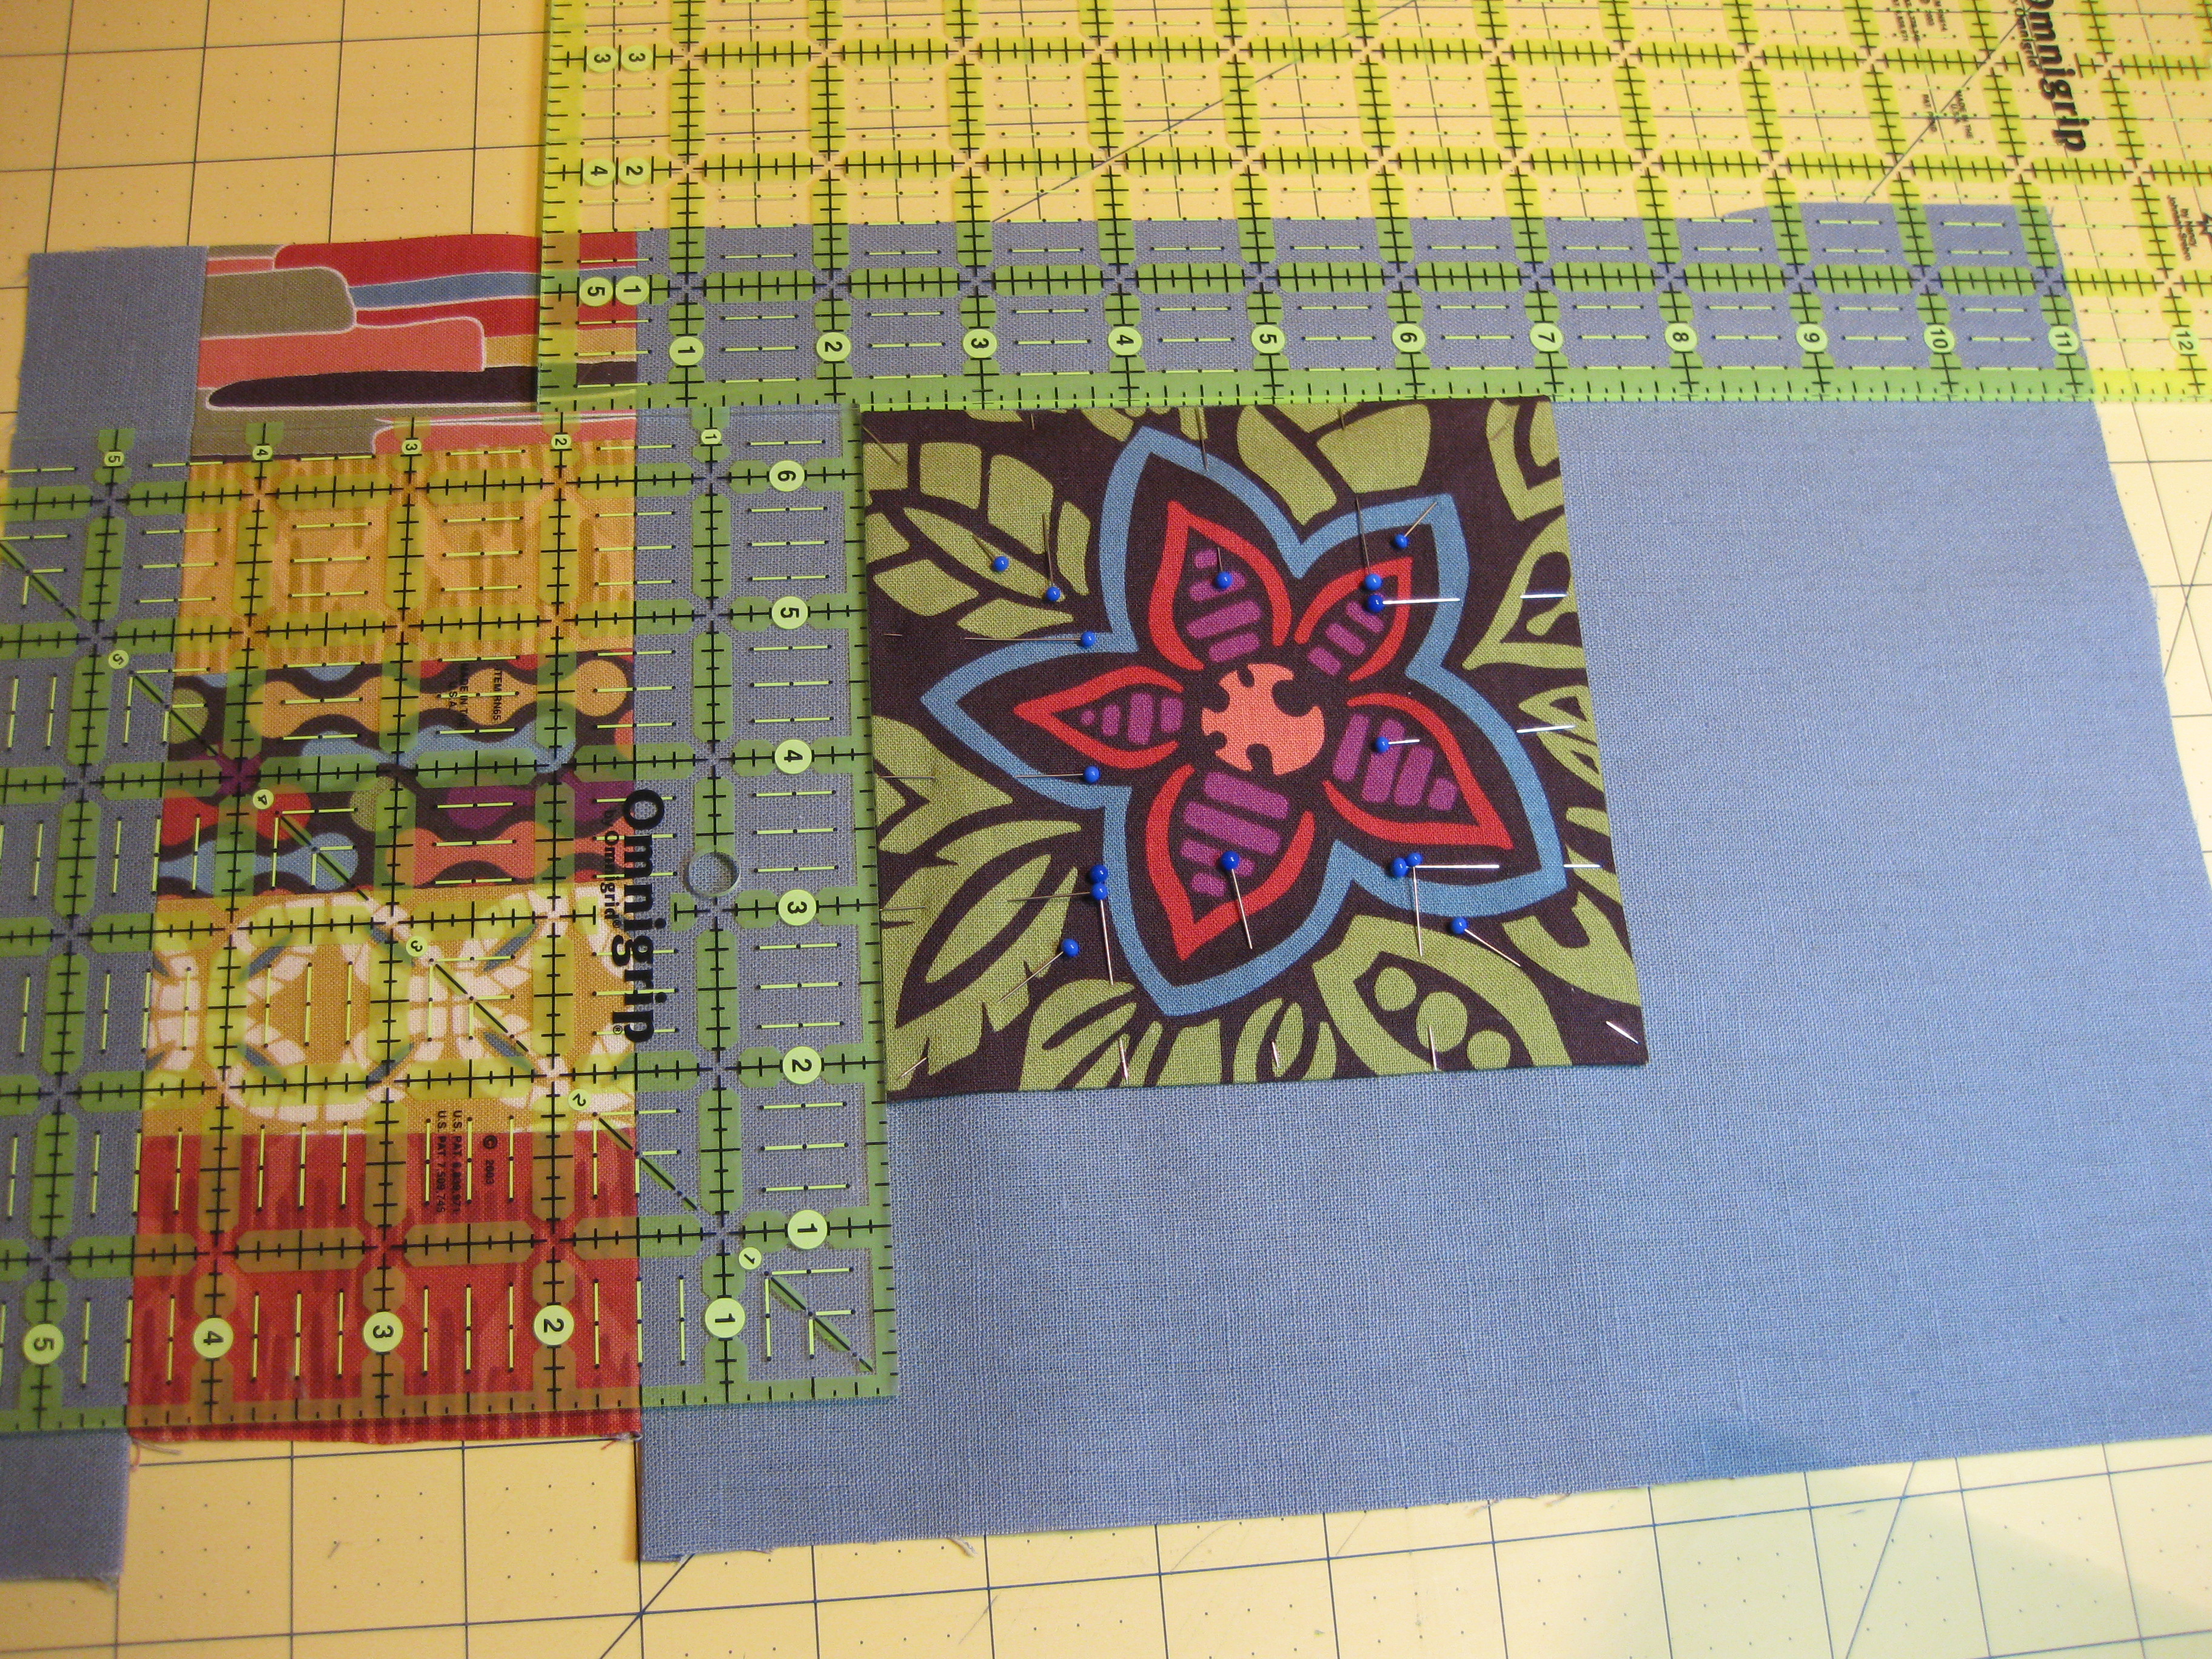
As you can see, I fussy cut a flower out of the boldest print and then created a stripe with the others – pressing all the seams open. Figuring I could be lazy, I used a technique where you sew a slightly narrower interfacing strip to the right side and then turn the ‘tube’ right side out (this forces the edges of the main fabric under just enough to prevent the interfacing from being seen). But once I did it I felt it was going to be too bulky to just top-stitch it down and I liked the strip when it was wider. I also realized that the strip was too long.
So I cut a wider strip and took off one of the fabrics, sliced the grey rectangle I’d arbitrarily cut to start and pieced it back together.

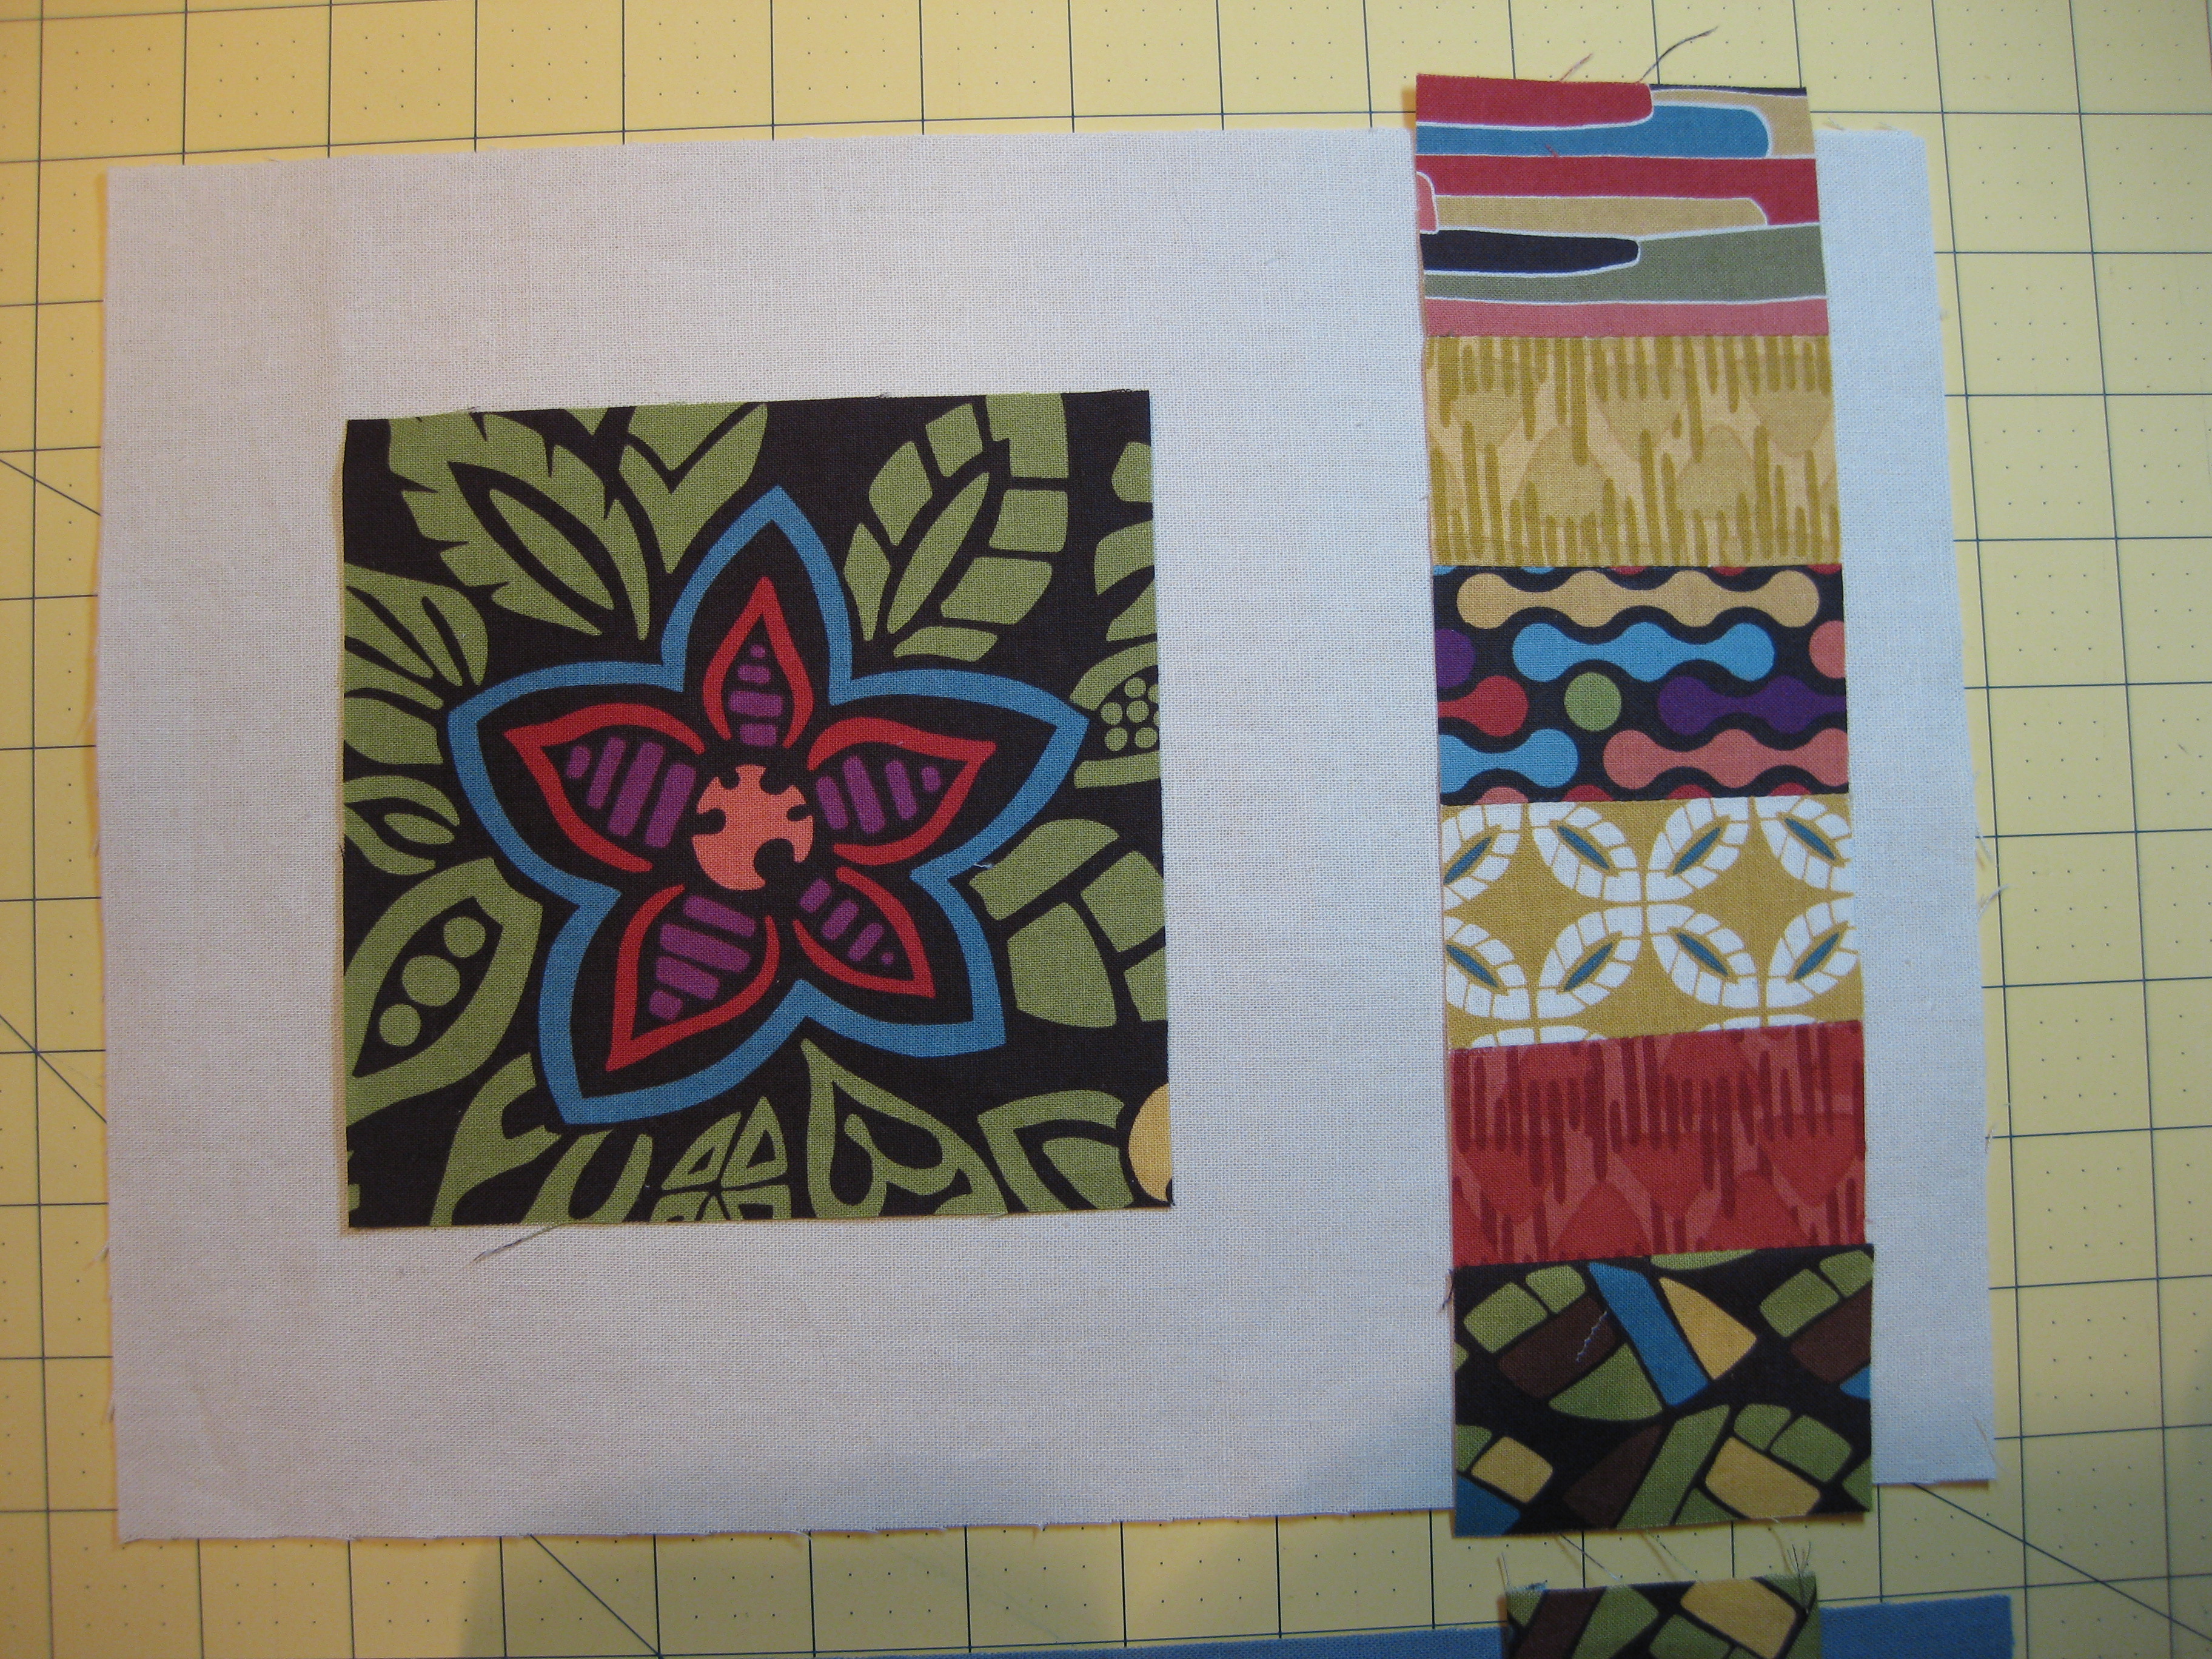
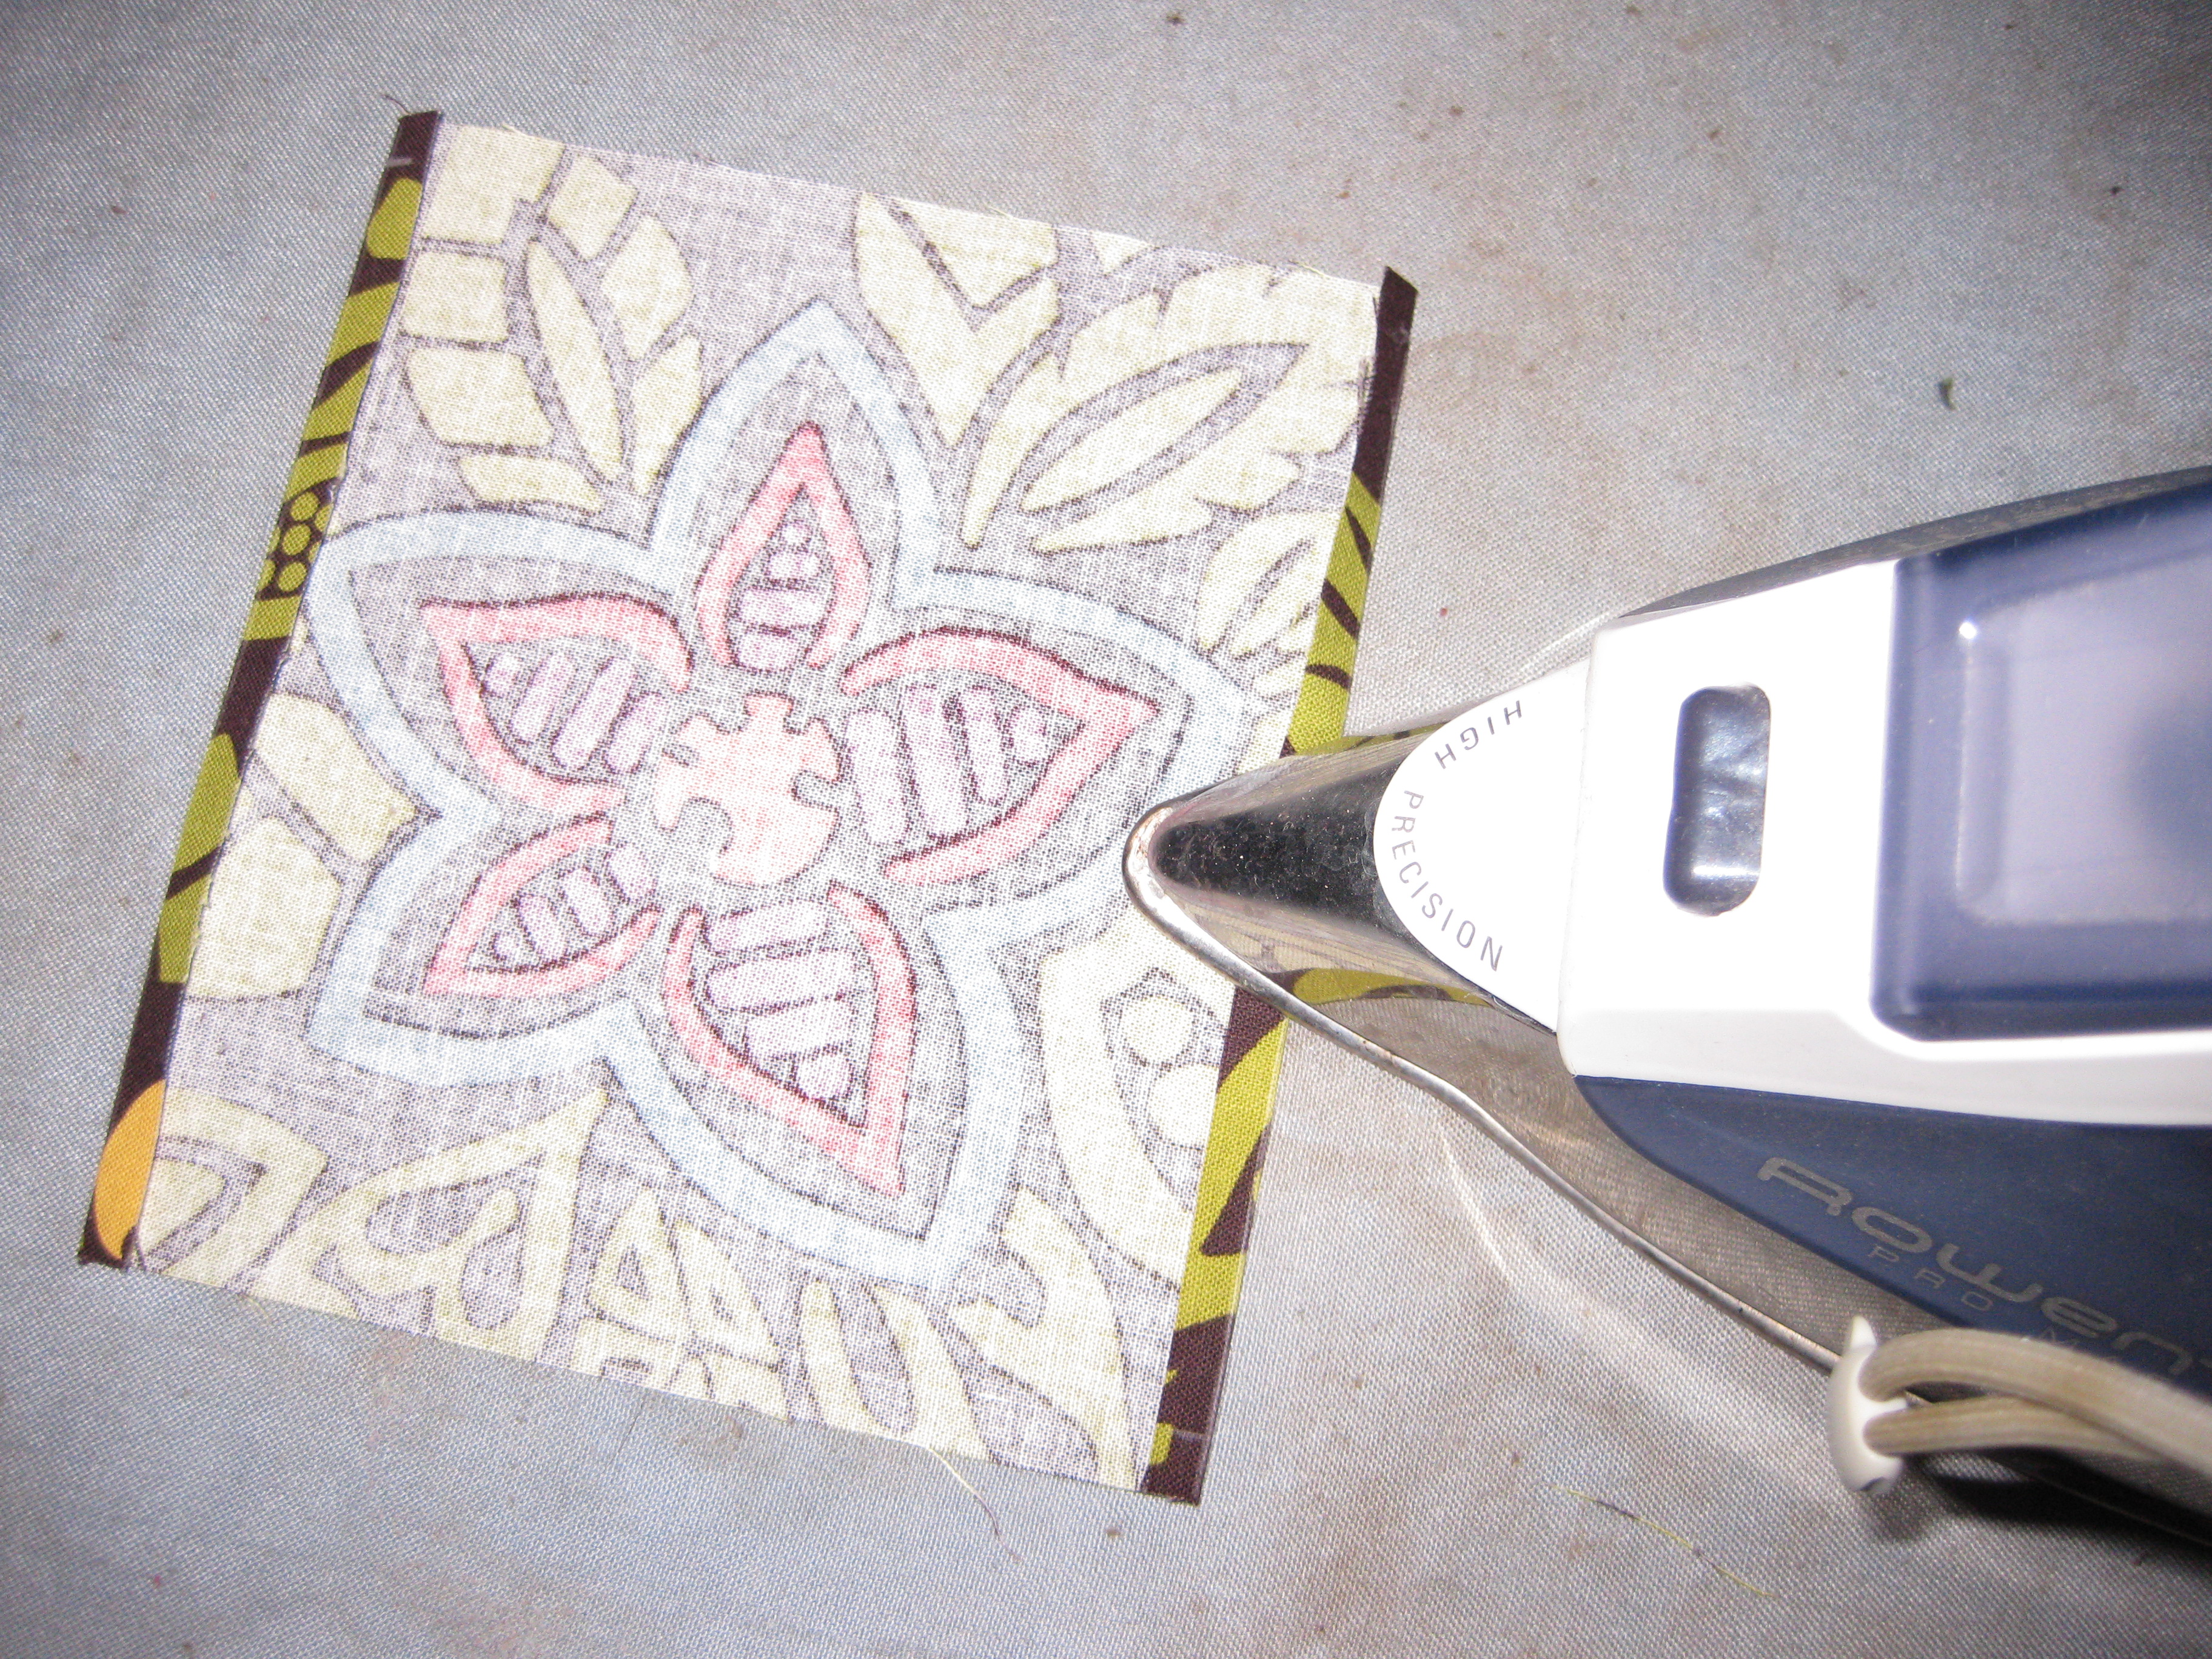
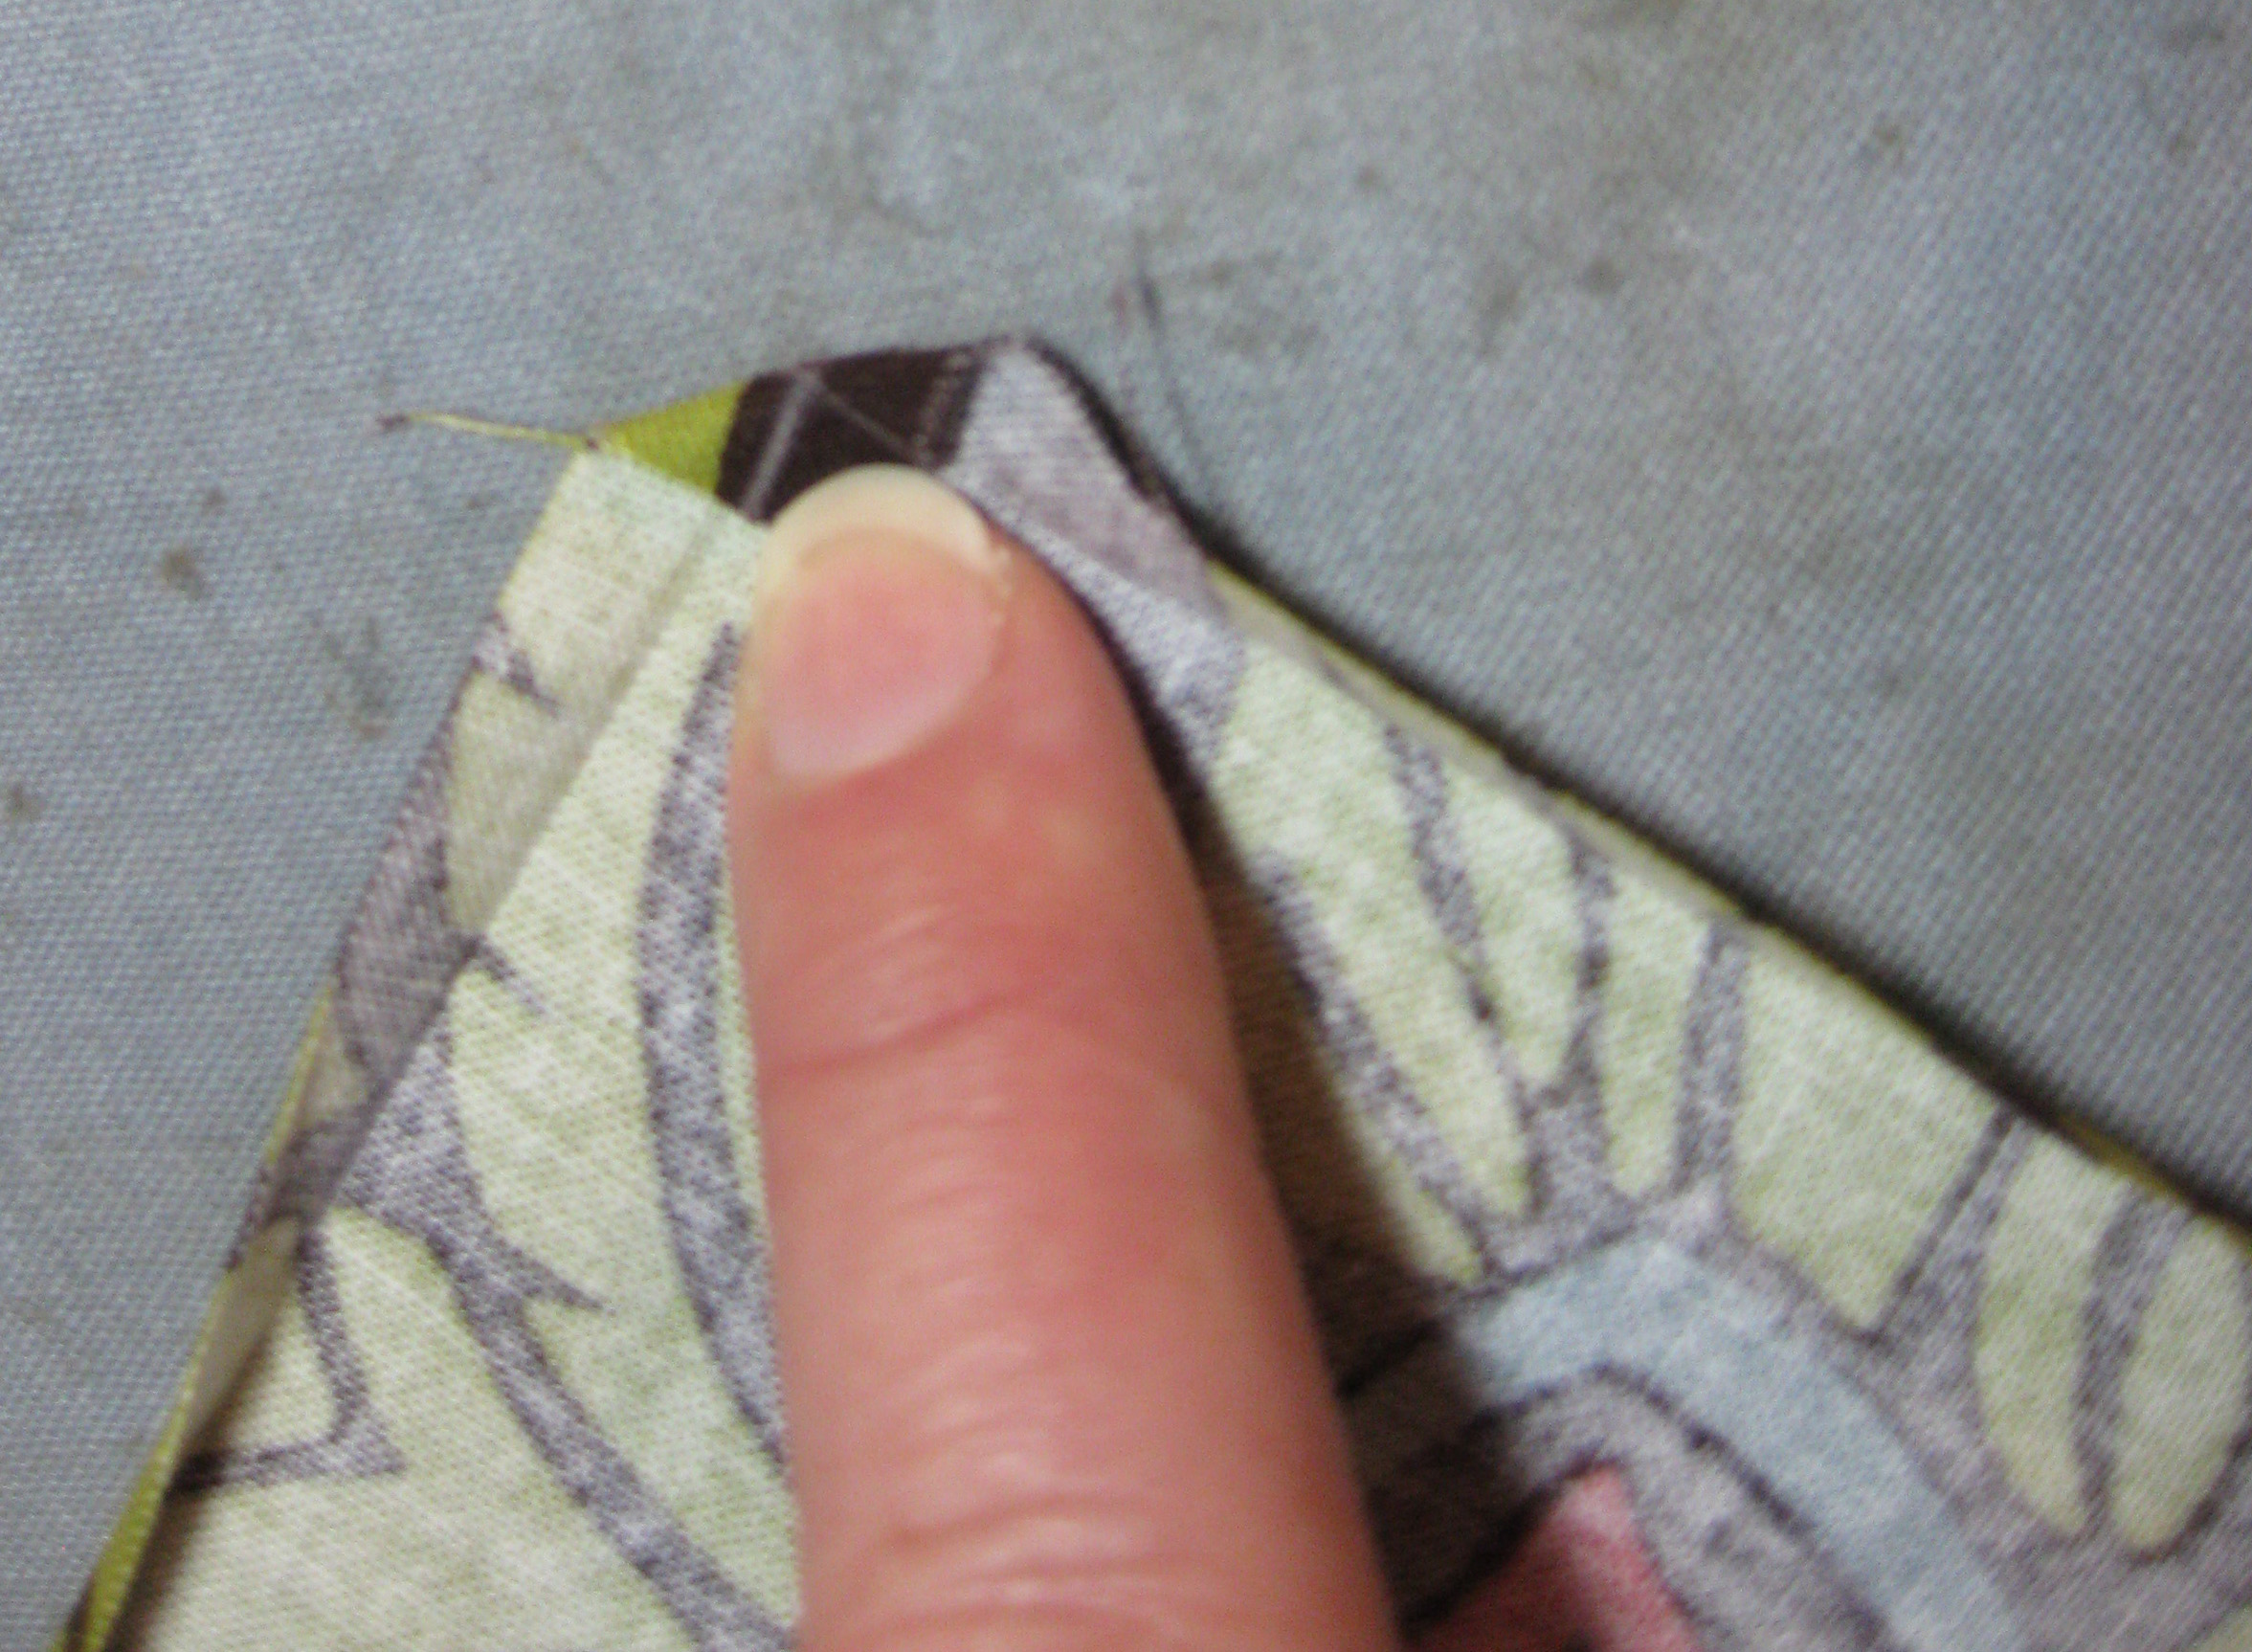
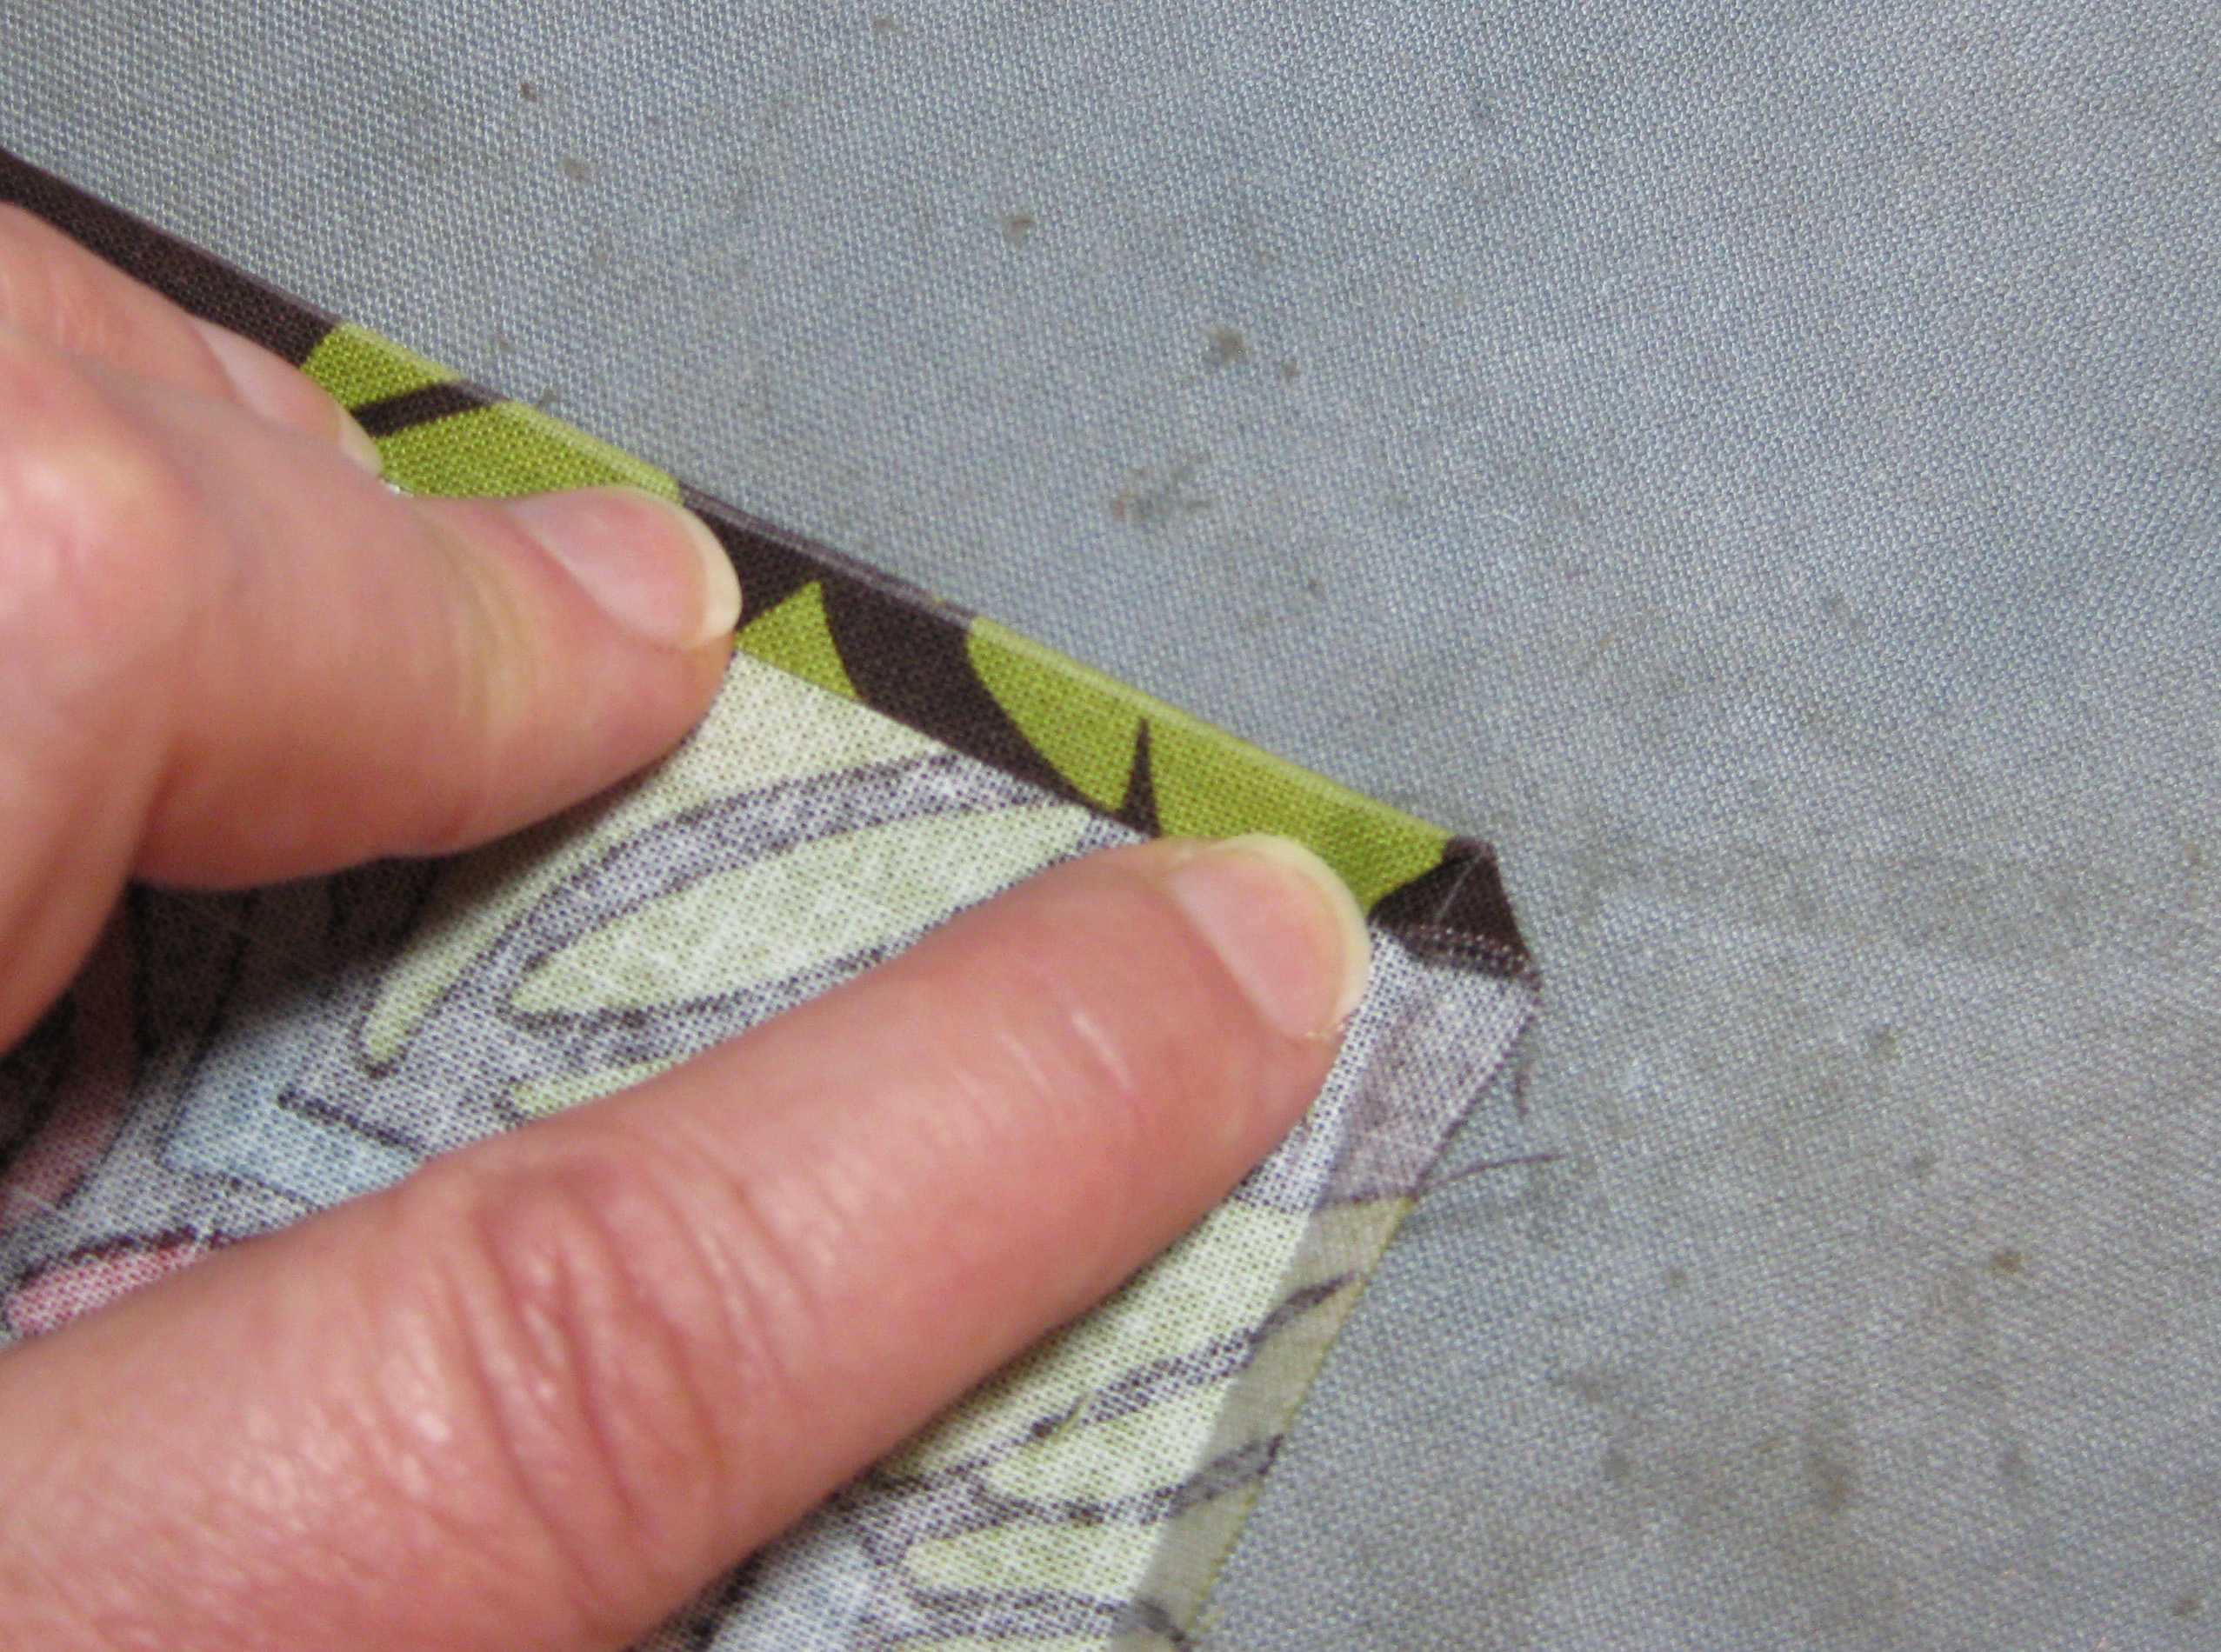
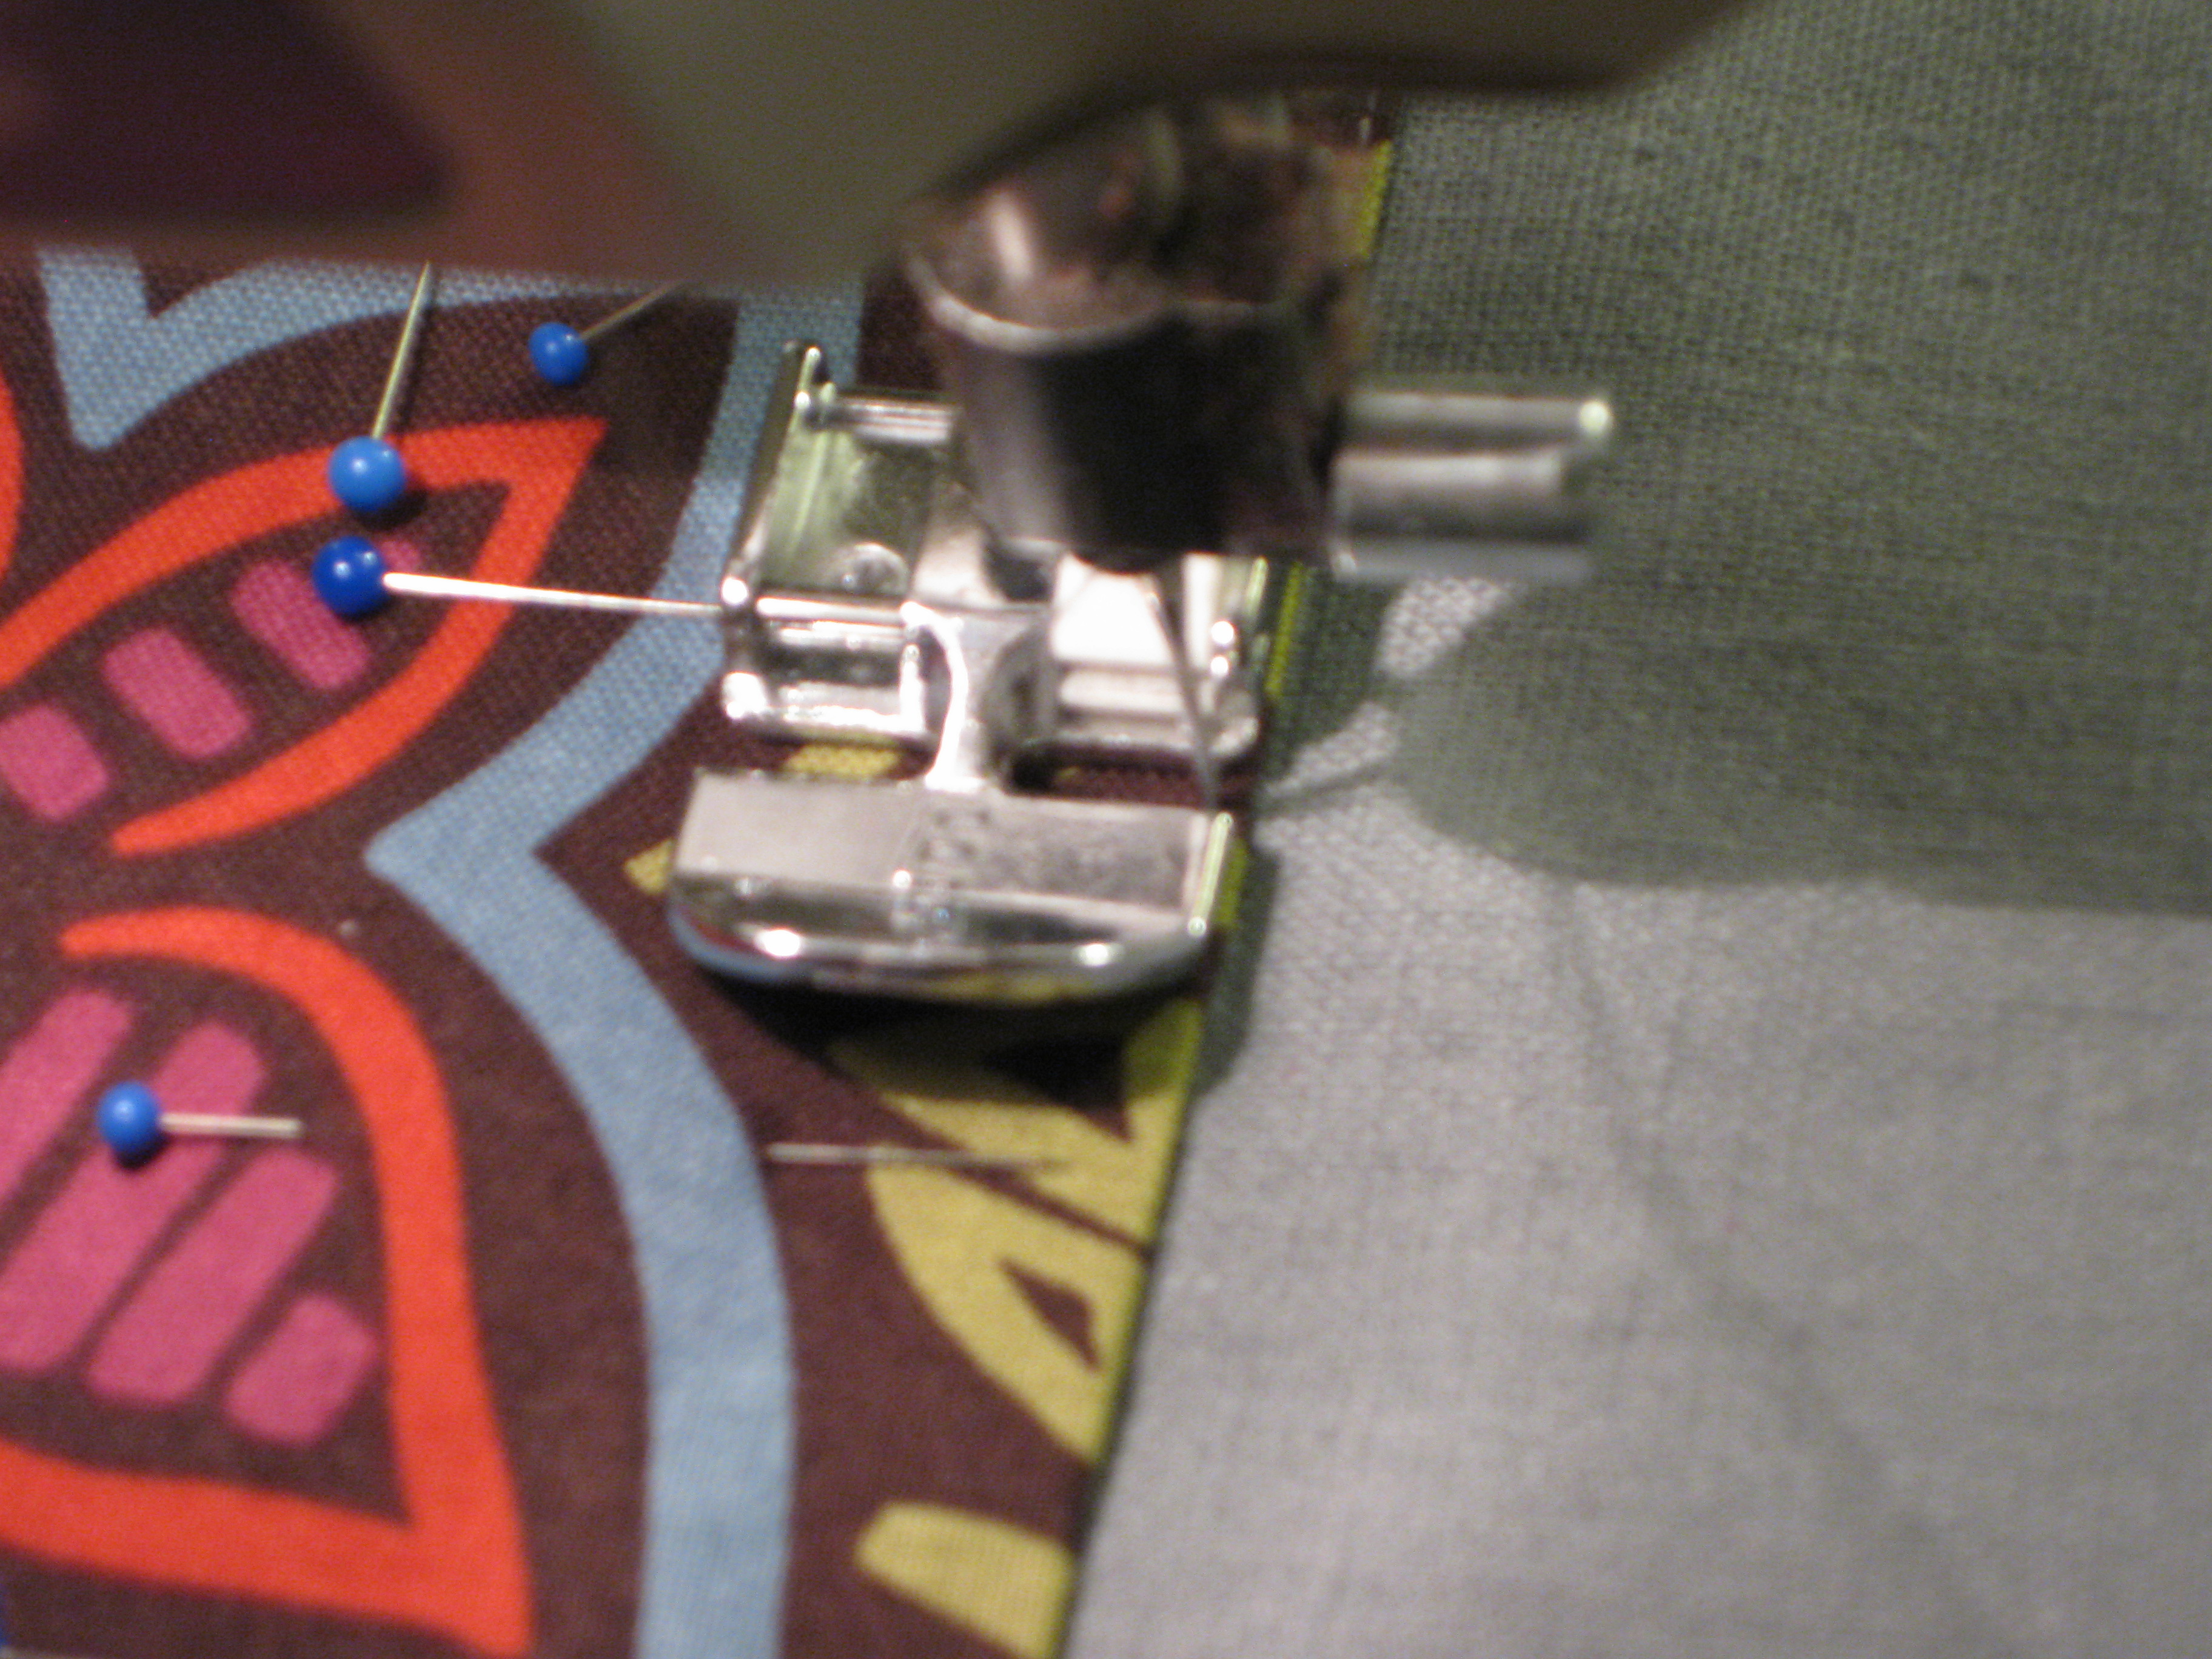
I did still want to top-stitch the fussy cut flower so that I had no seaming through the grey fabric. Just the fabric. I cut it out and then folded under 1/4″ all the way around. At the corners, I drew chalk lines to help with the folding – rather like a paper airplane – fold down the corner and then bring in each side until they line up. A darn sight more difficult though – because fabric doesn’t want to stay put!
Now this next part it embarrassing. I thought it looked great positioned an inch away from the stripe and I managed to make that happen without a problem – on the first one! For the second one I had a duh moment and measured 1-1/2″ from the stripe. You know – the one inch I wanted plus a 1/2″ for seam allowances. Seam allowances I didn’t need!! * sigh *
Doesn’t it look great with the one inch spread shown in the picture below? Then there’s that second one. I know it’s not horrible, it’s just not what I wanted. And they’re different! And it led me to make the mats wider than I wanted!! 😛
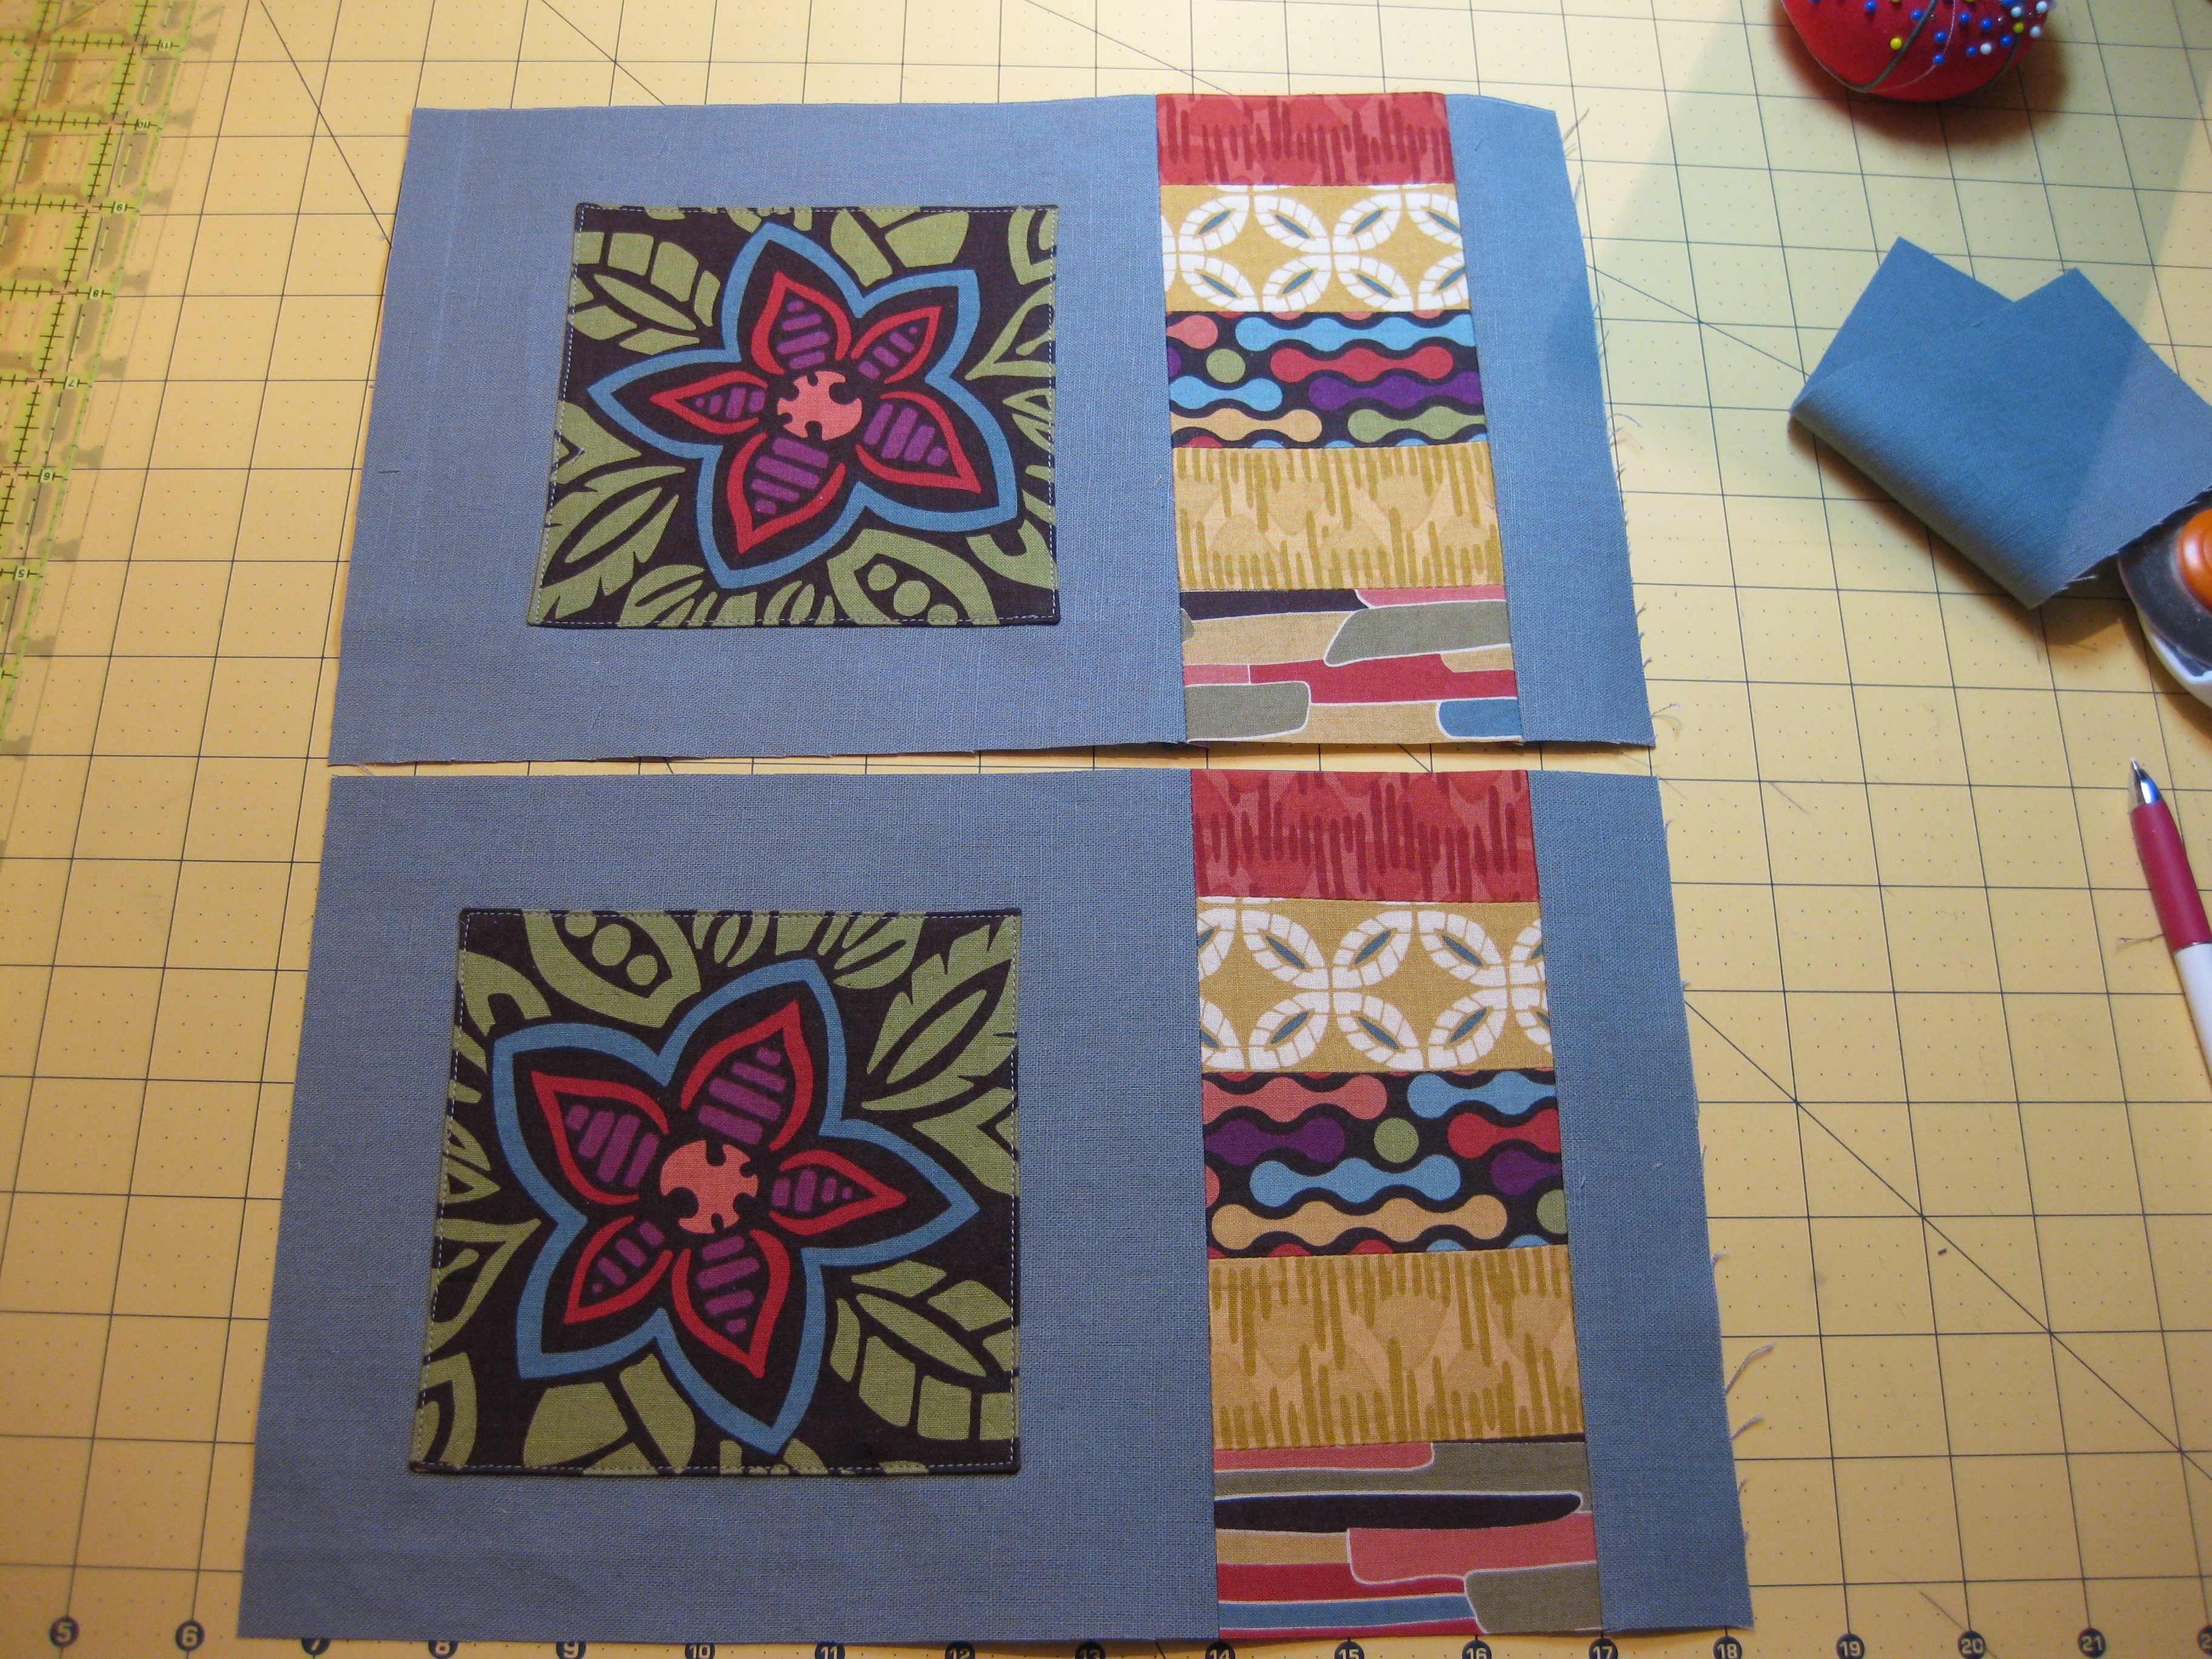
Ah well – being all ‘matchy-matchy’ is overrated, right? Right!
Finally, I cut some thin batting rectangles and did some of the quilting before the backing was in place and then put generously cut backing fabric in place and quilted some more. I cut it generously because I decided not to do a regular binding but to fold the backing fabric to the front so that it looked like binding. To do that, after finishing the quilting I gave everything a good press and then trimmed the backing to just over 1/2″. I folded 1/4″ from the outside and then folded that onto the top of the mat – the “just over” 1/2″ allowed some fabric for spanning the sandwich height. Did the corners just like I’d done those for the top applique (trimming the corners first so that their points wouldn’t show).

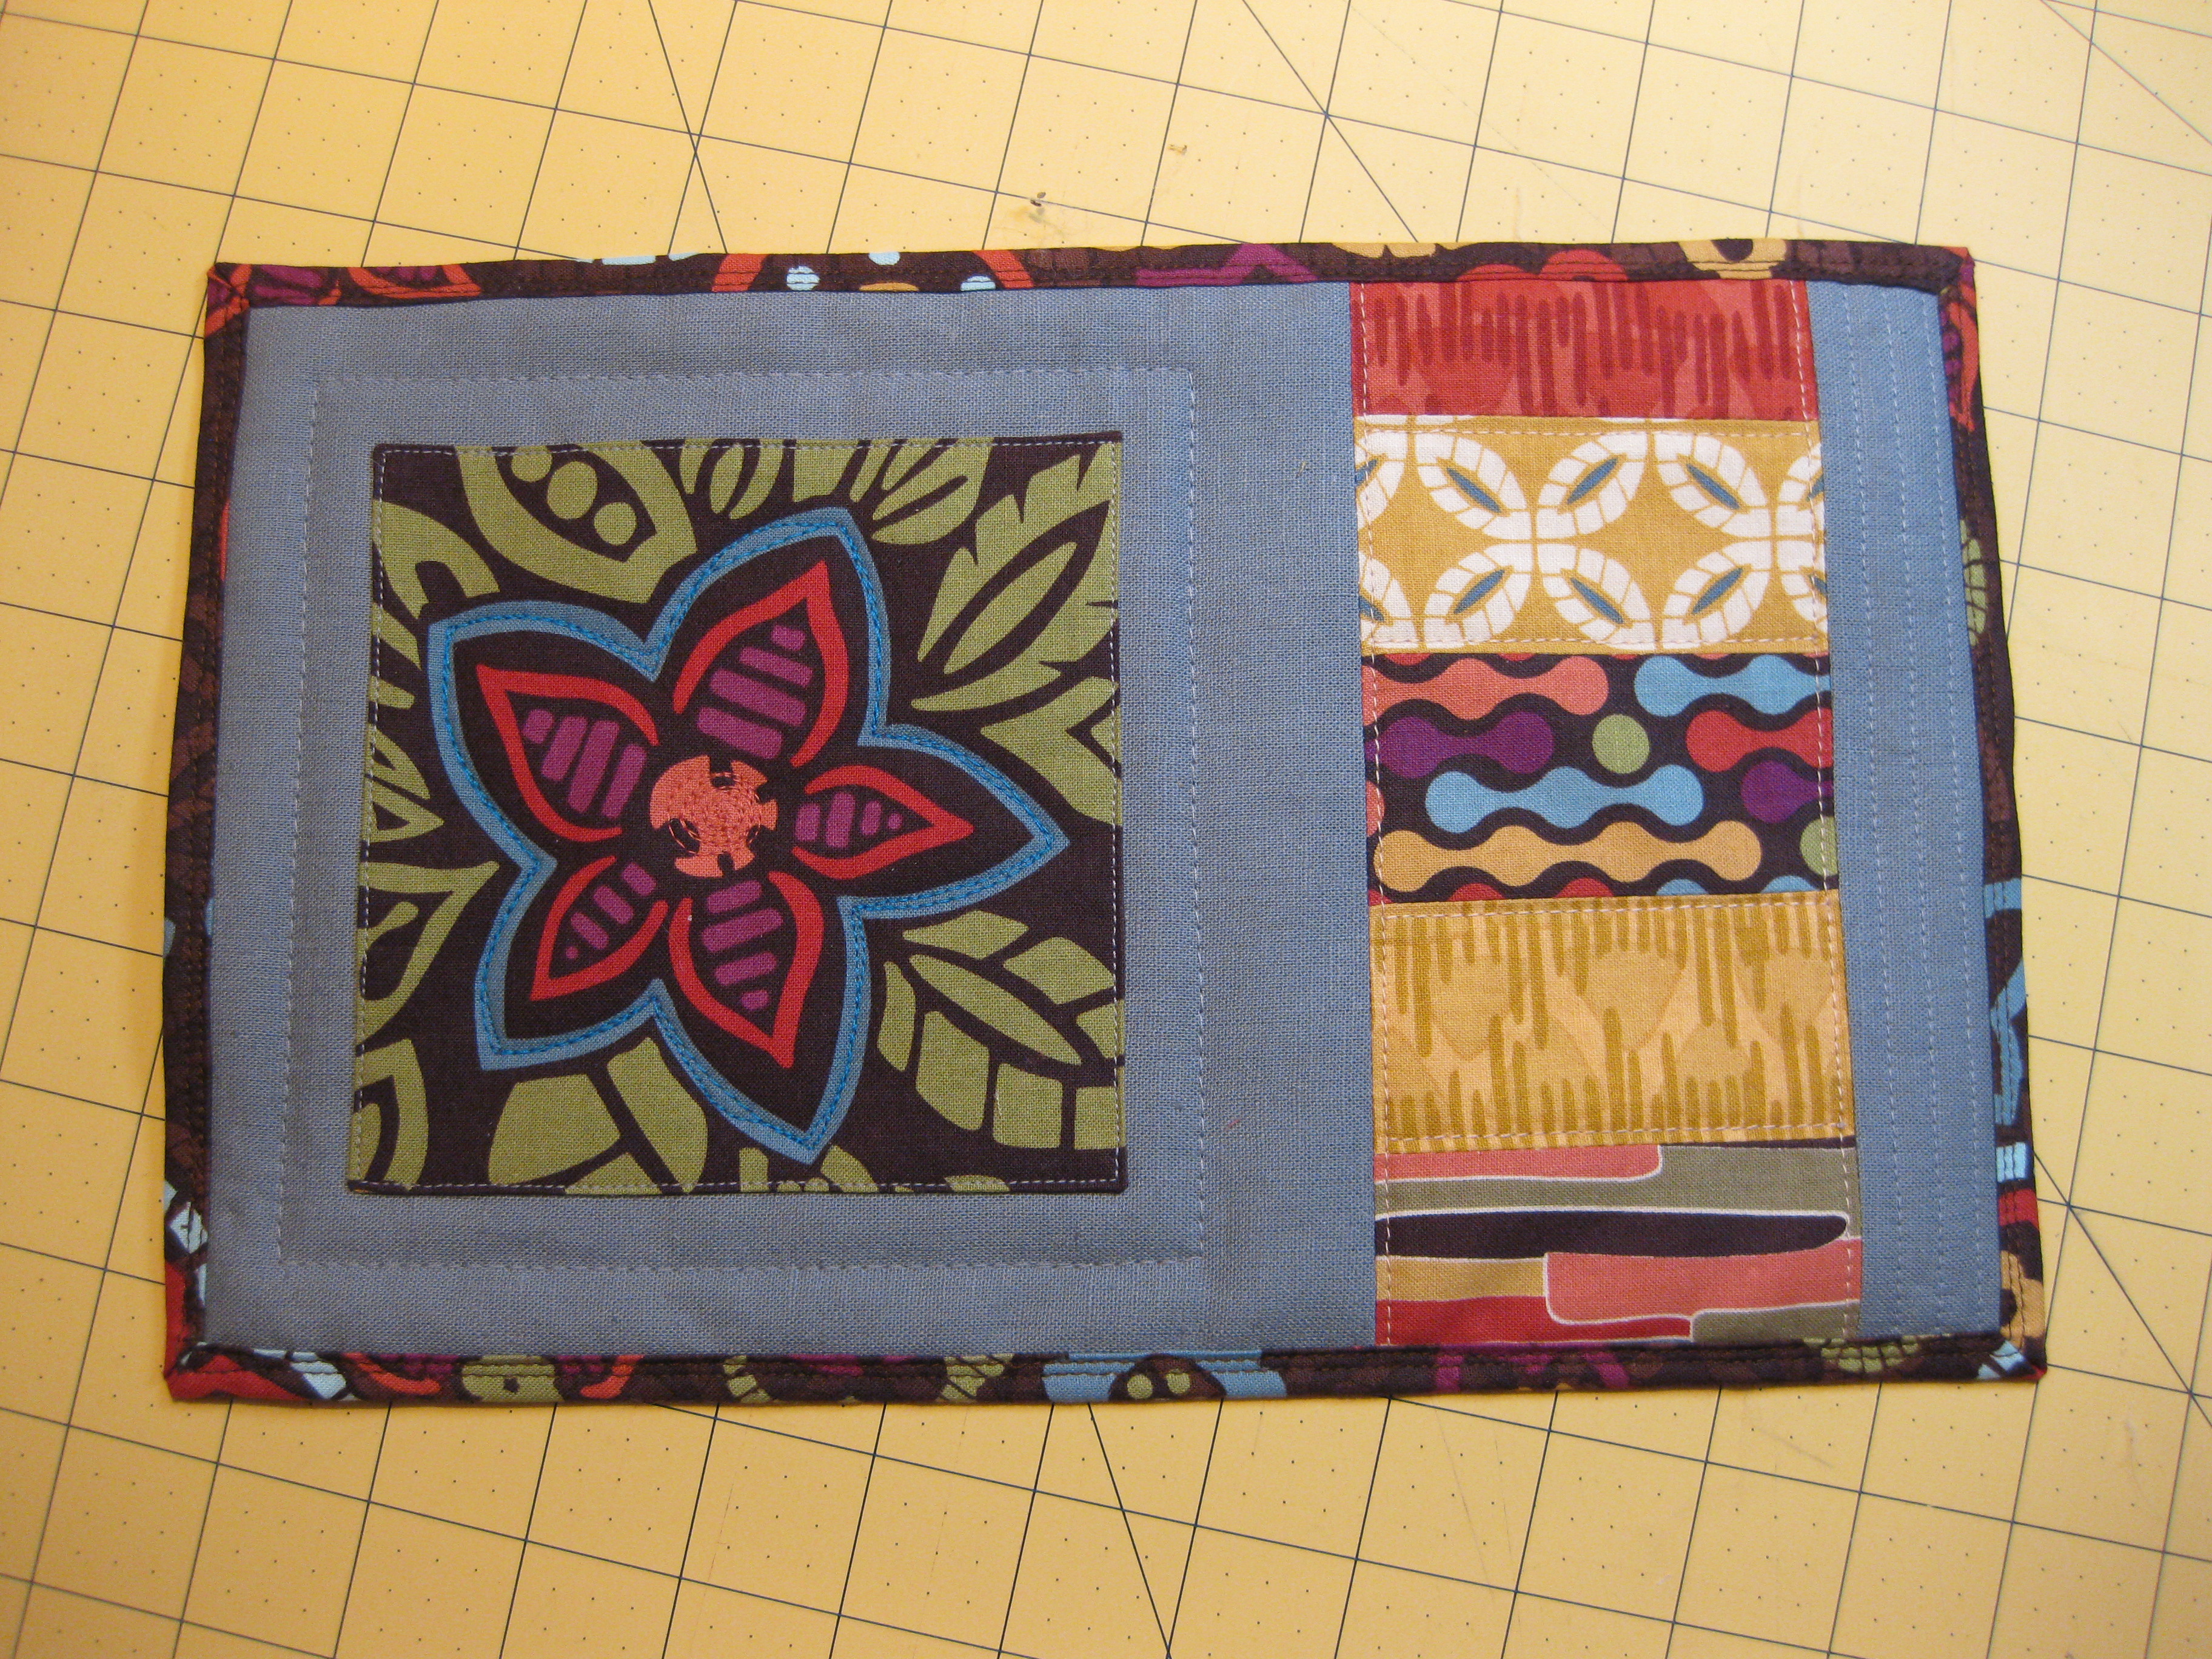
Considering how tricky this last technique proved to be, I really think it would have been easier and faster to just bind them. These ended up big for mug rugs – something like 7″ x 10-1/2″ – but I’m quite happy with them. My recipient will just need to plan on big mugs and big scones!
Next time I definitely need to sketch out a plan to help keep me consistent from one thing to the next. LOL